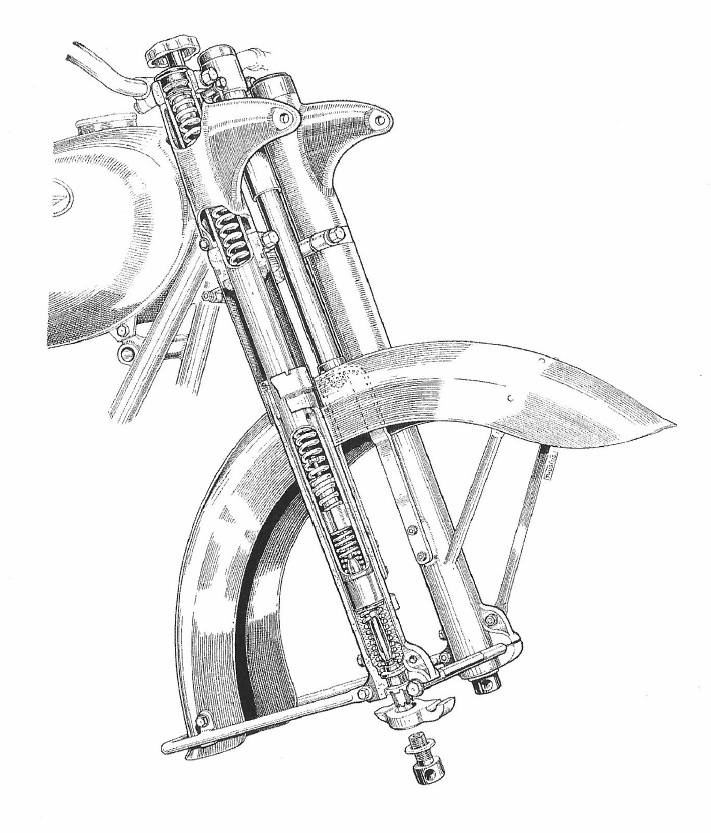
The front suspension of the KS601 consists of a single shock absorber that is mounted on the front fork and rests on the front mudguard and and sprung telescoping fork legs. The shock absorber we’ll cover in a separate topic.
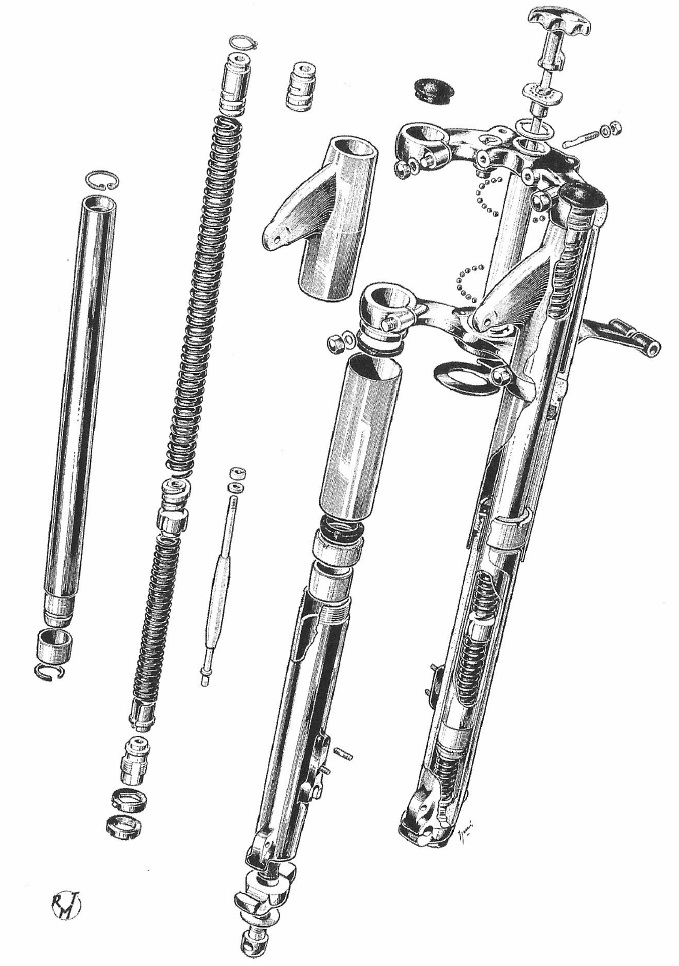
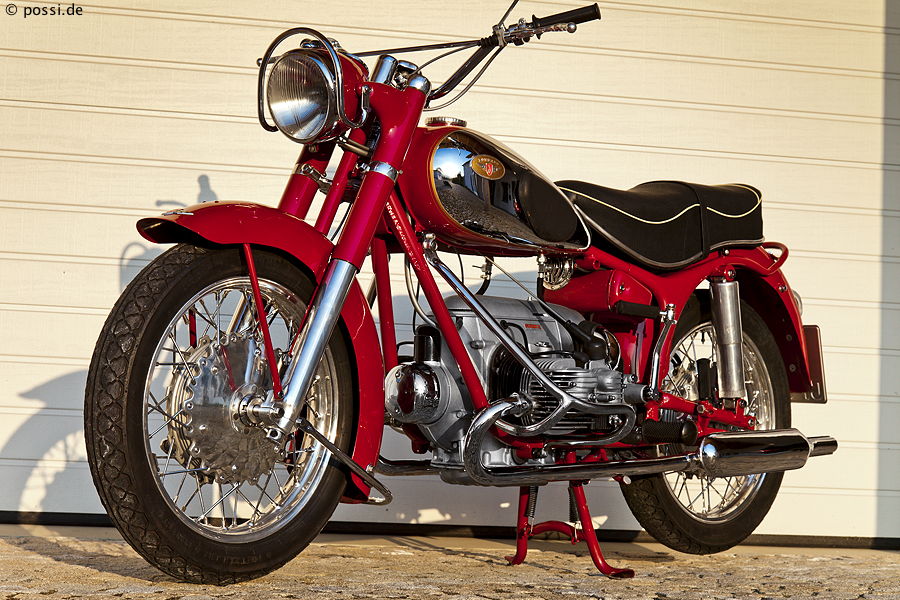
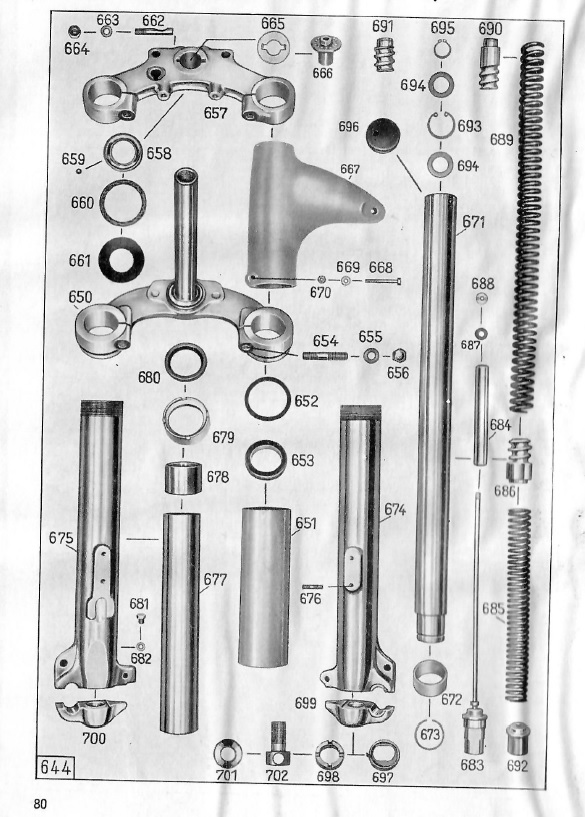
Here’s the comparison between what is on my KS601 and what it should look like:
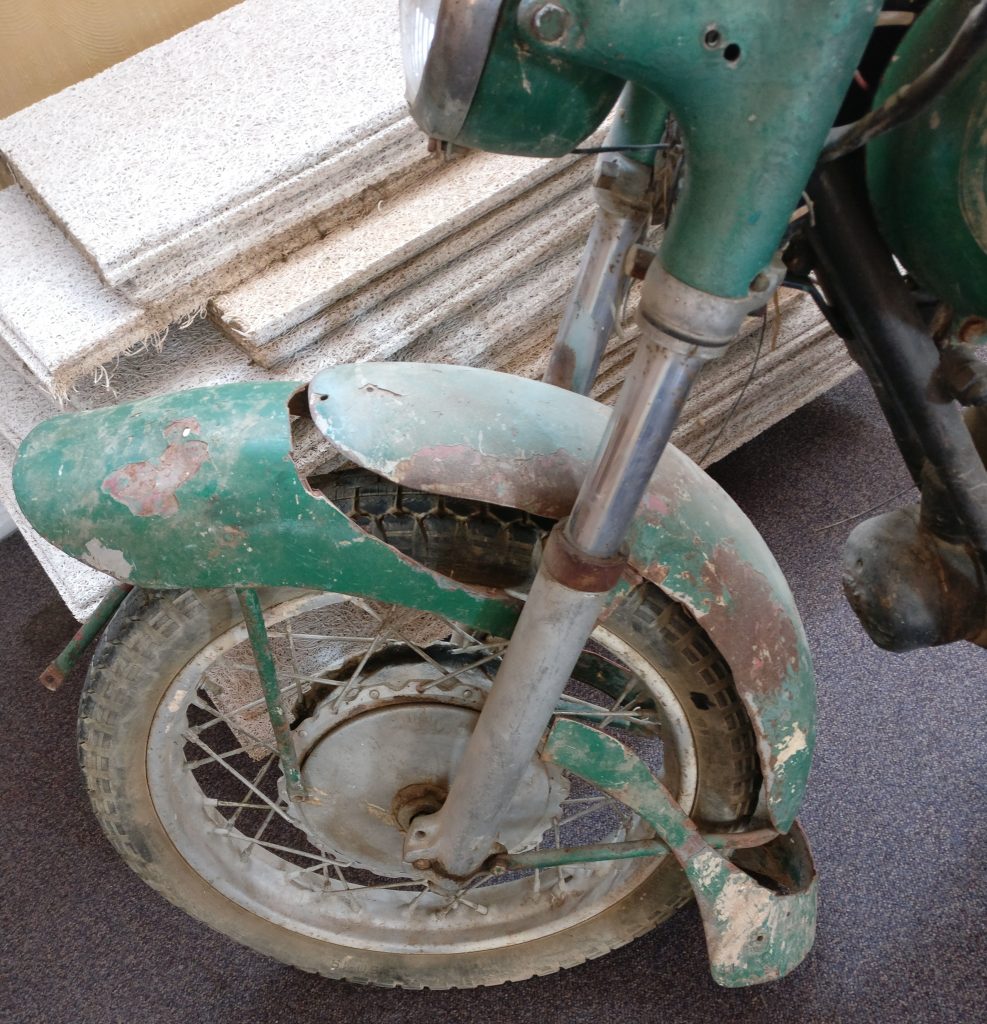
So it’s clear that the fork shrouds are missing, there are some extra holes in the headlamp brackets (probably from an indicator modification in the past) and that there is a fair amount of rust damage on the inner fork legs.
To take the front fork apart, first remove the front wheel and front mudguard. Then loosen the bolts that hold the inner fork legs fixed in place and then pull the legs down through the headlamp brackets.
That immediately shows us the first surprise of the KS601 – the front fork lower bridge is damaged.
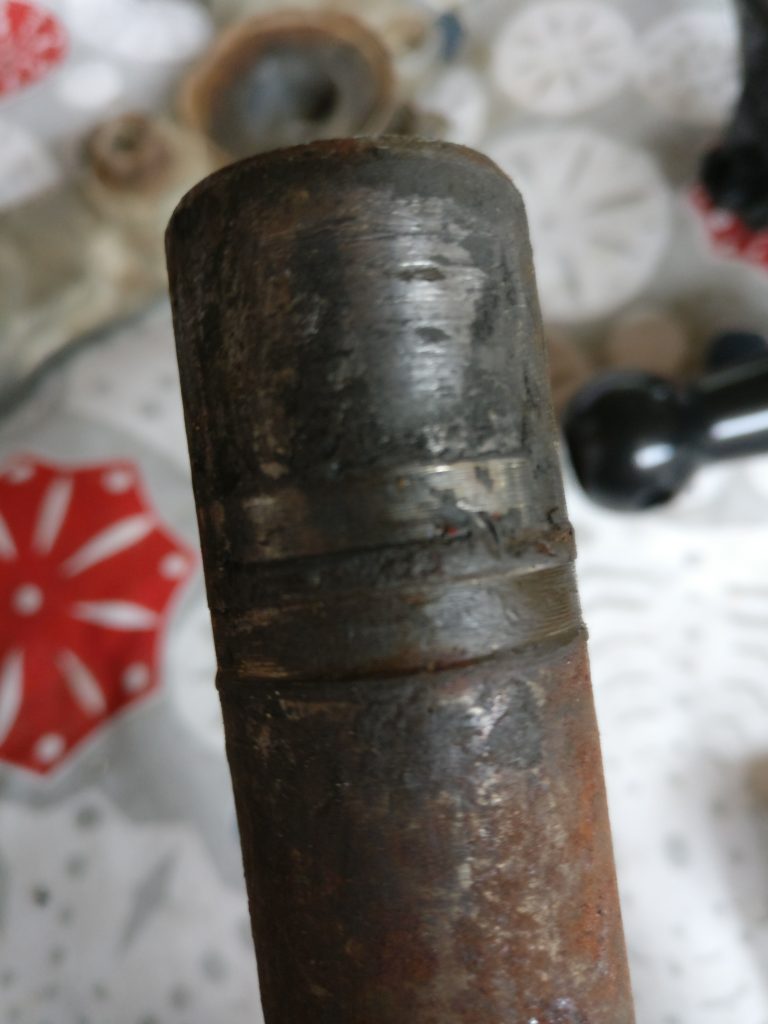
As you can see, the race of the top bearing has seriously ground into the bridge rod. This can happen when there is too much play in the roller bearings and the fork rod starts to rattle from side to side and front to back or when a bearing race of inappropriate inner diameter was used. We’ll put that issue on the list of things to fix.
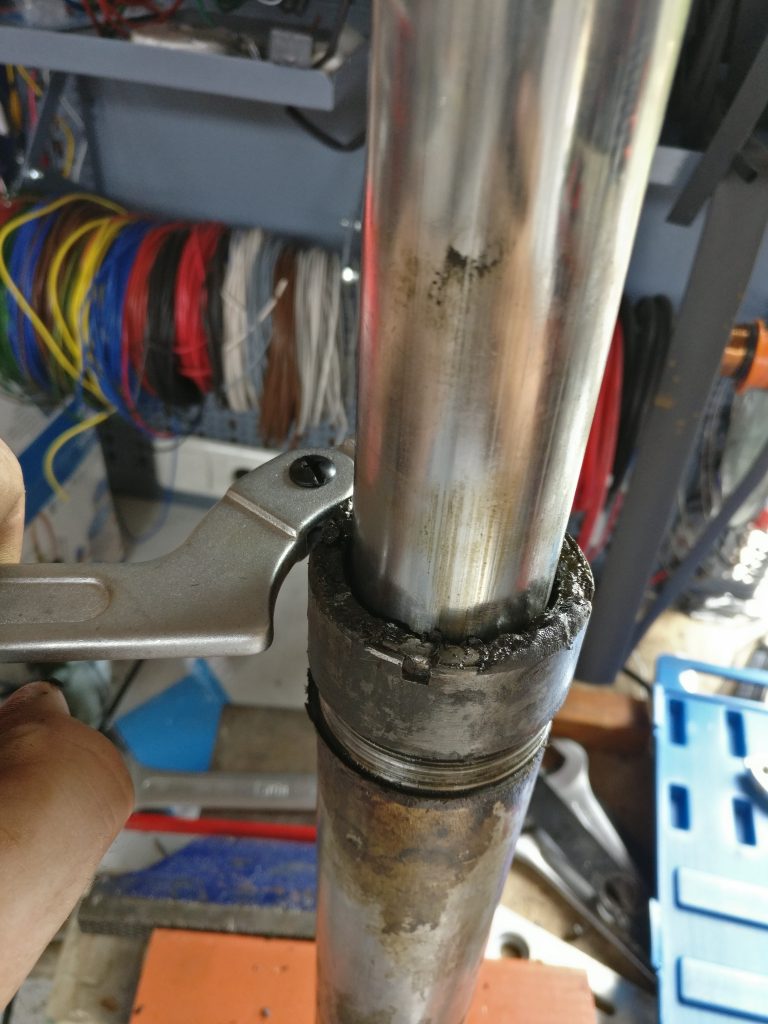
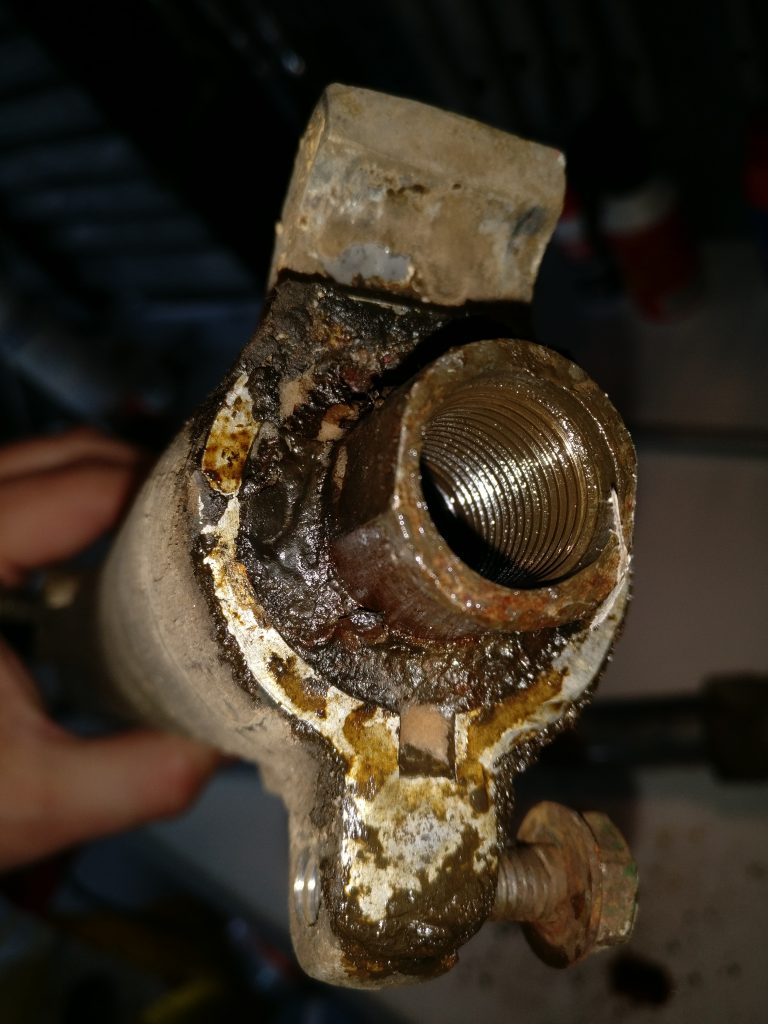
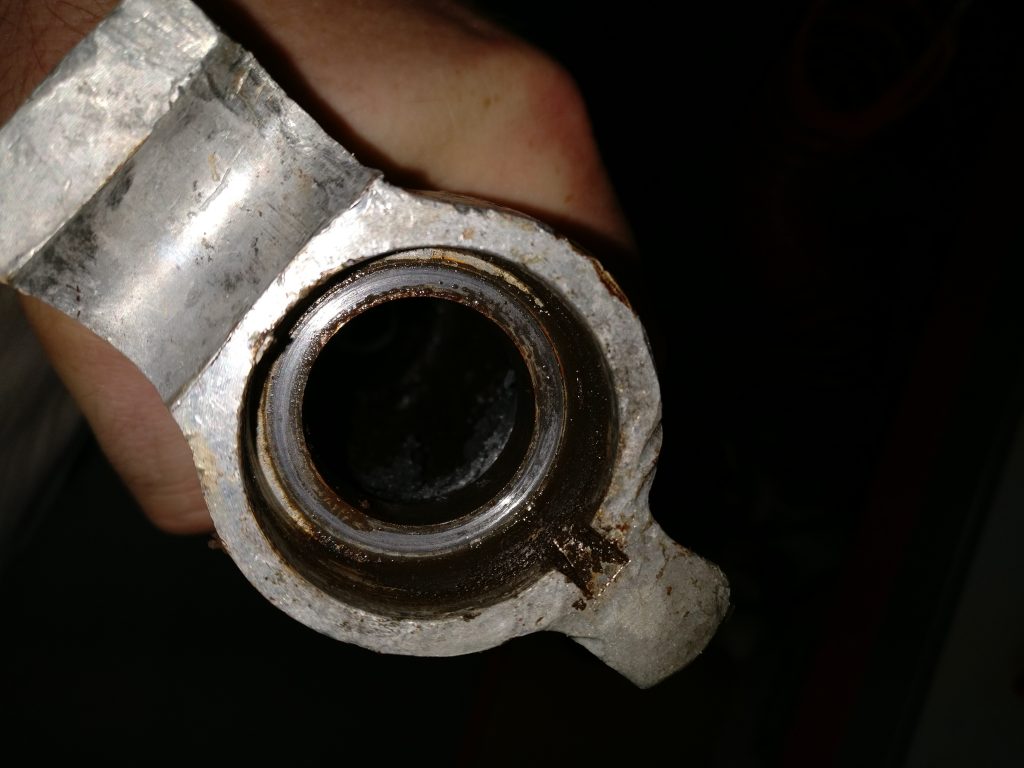
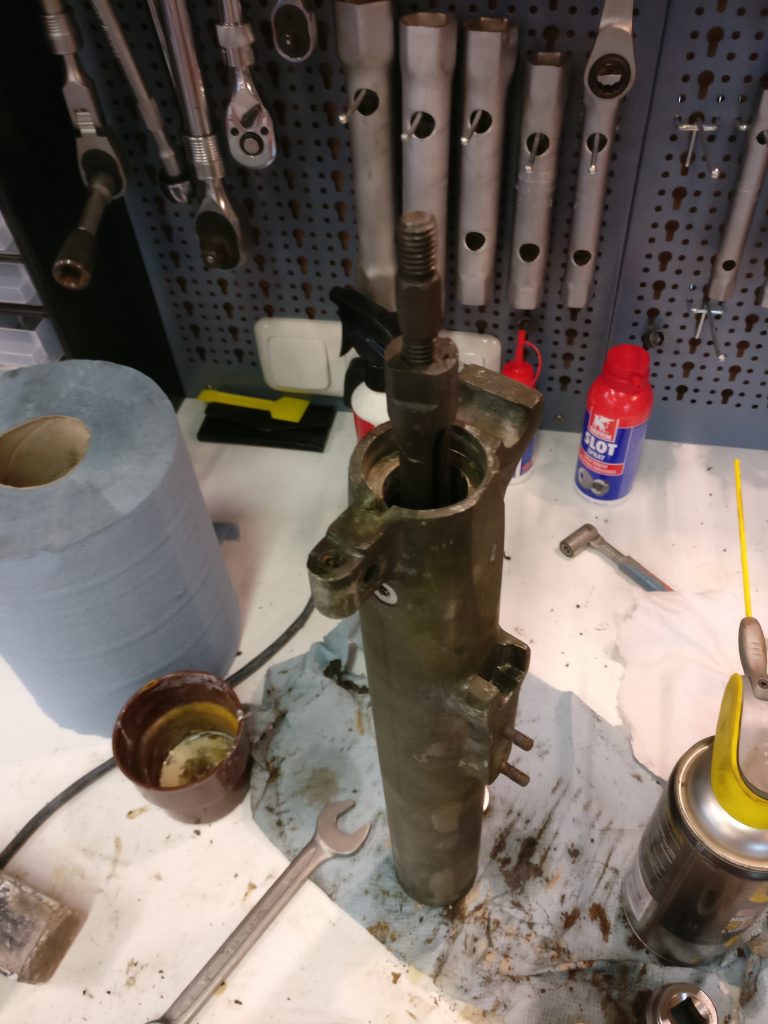
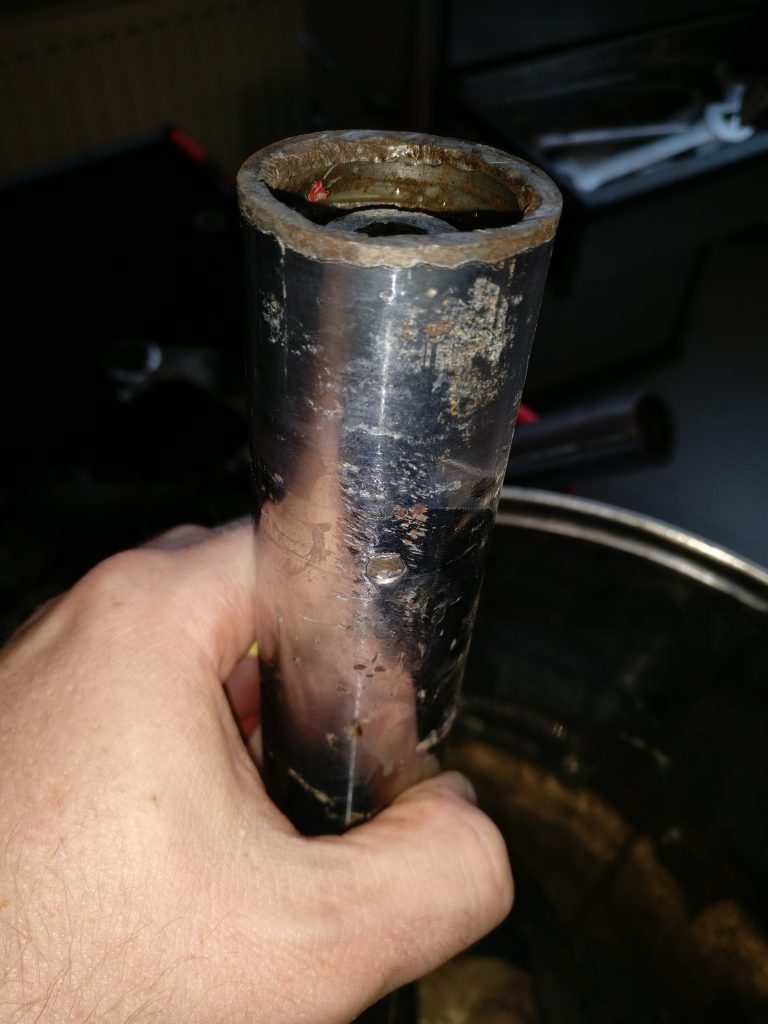
Next we’ll take the fork legs apart. To do this, first take the rubber cap off at the top. In my case they were missing which made me nervous on how much water may have gotten inside. When looking from above mine look like this:


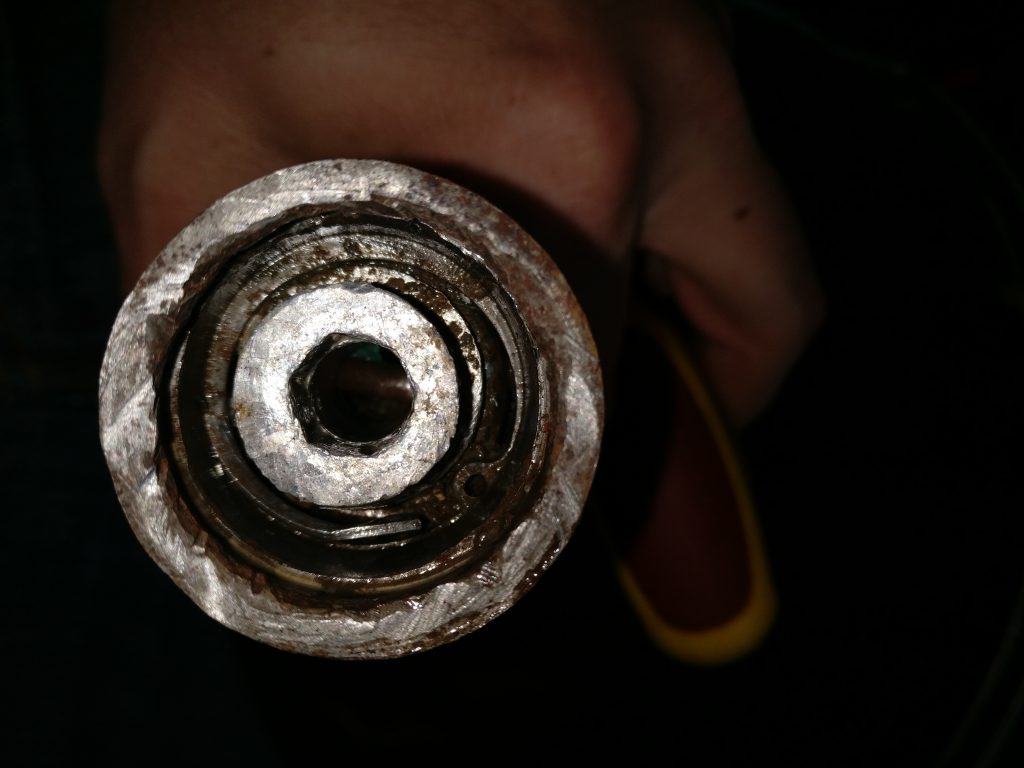
That’s rather messy. After a bit of scraping you can just about see the remains of an inner seeger ring where one eyelet is missing and underneath that the top spring support. This is not as it should be (what a surprise). There should be a small outer seeger ring that fits around the top of the hex piece and underneath that there should be washer. Then there should be the inner seeger ring underneath that and finally another washer. Only then should we be able to see the top spring support.
The inner seeger ring with washers on both sides stops the spring from coming up through the top of the inner fork legs. The smaller outer seeger ring stops the whole spring stack from falling down to the level of the oil seal castle nut when you for example take the wheel out. The oil seal castle nut will prevent the lower forks from fully falling out, but at first glance this setup meant that the spring stack was loose in the inner fork.
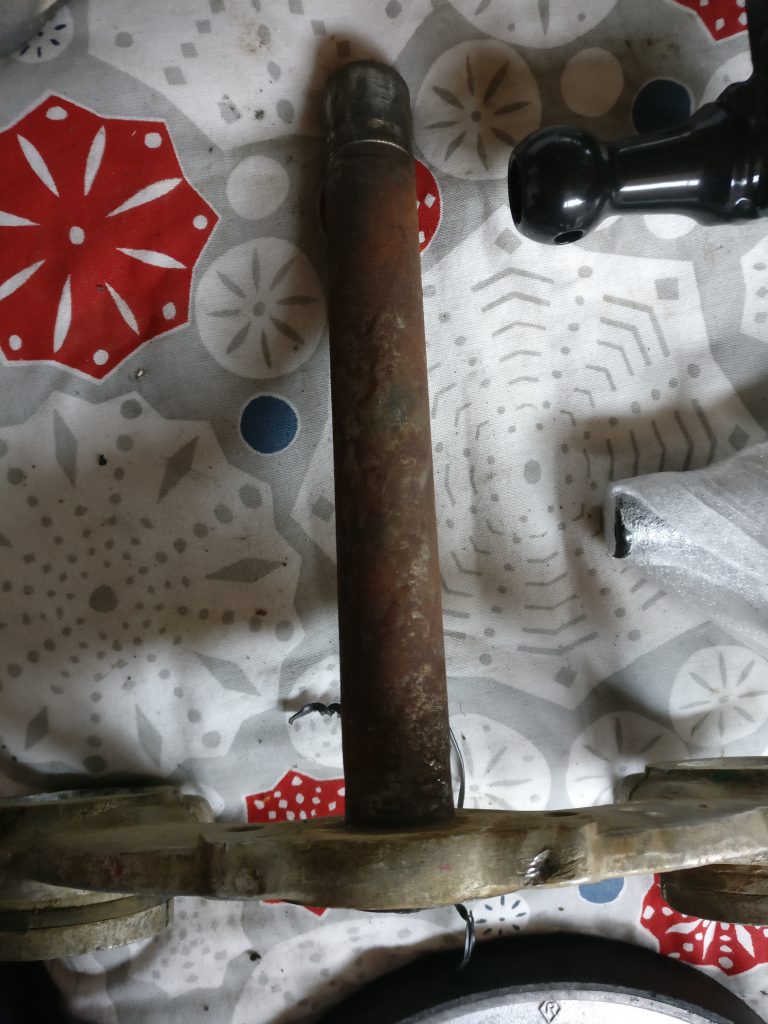
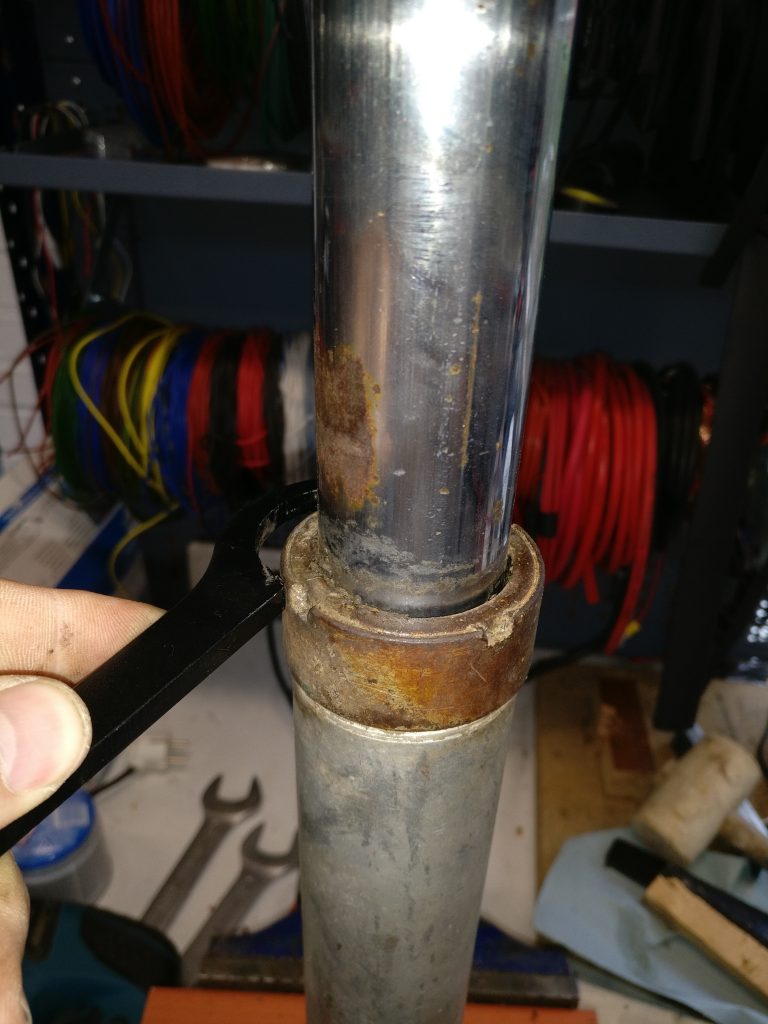
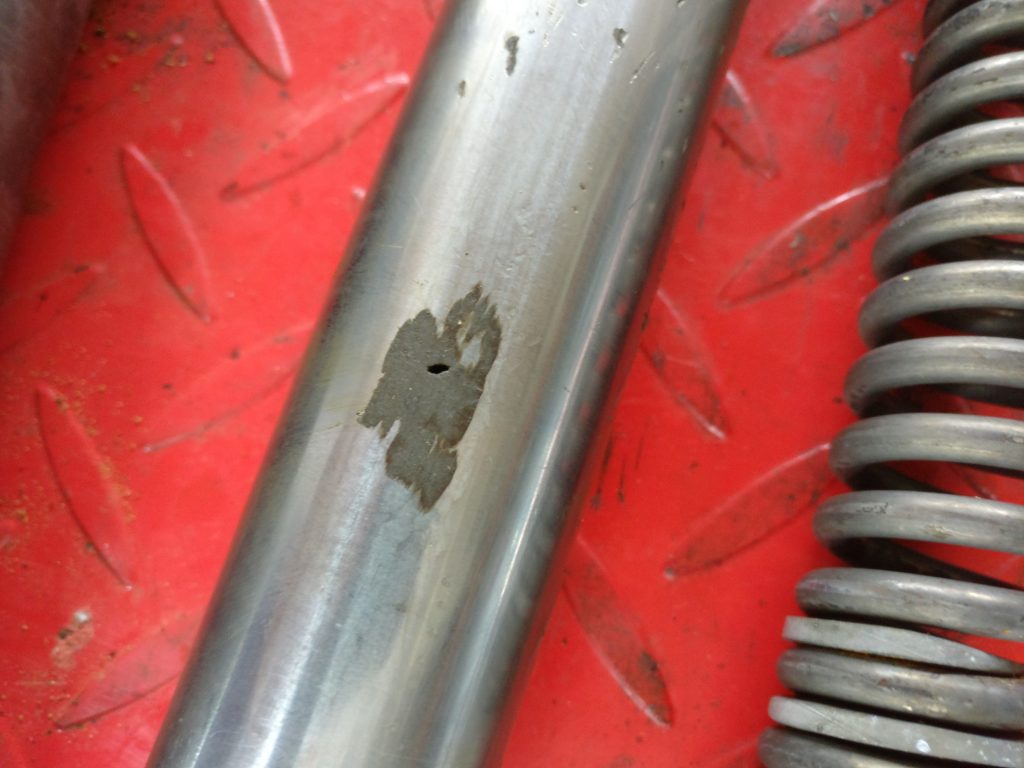
Having taken the broken seeger ring out I expected the spring stack to come up, but that didn’t happen. Upon closer inspection it turned out that a previous owner had take a rather rigorous solution to stop the spring stack from moving: they drilled a hole through the top of the inner fork and stuck a metal pin through:
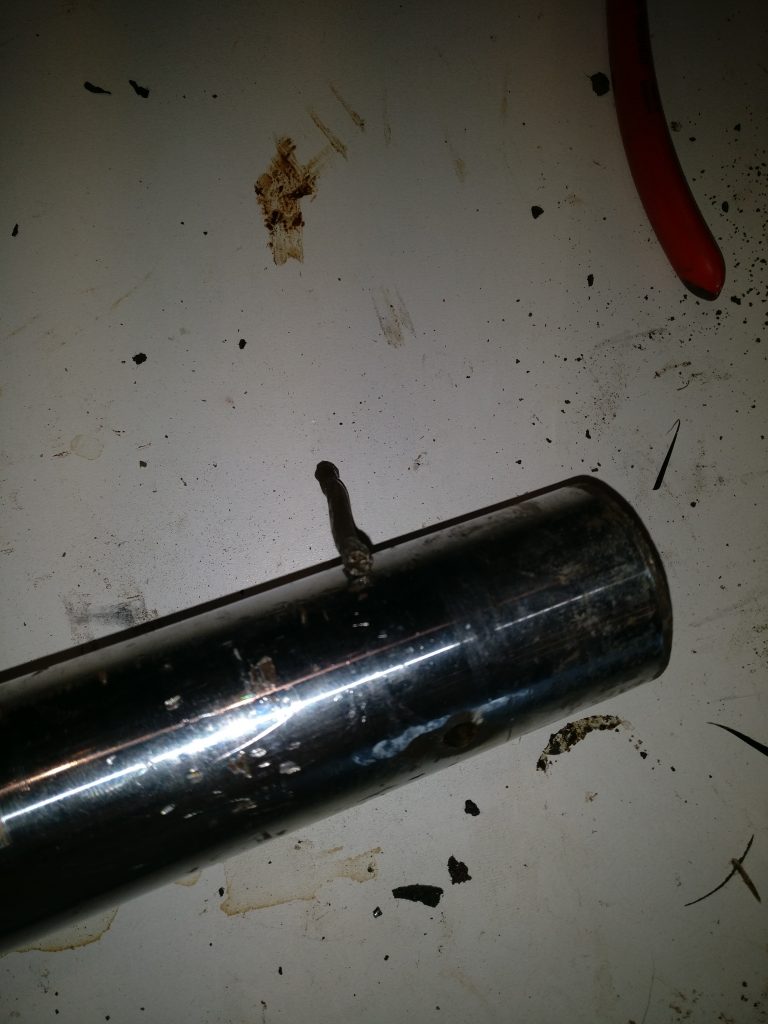


This turned out to be the same for the other fork leg. The only difference being that there was one of the two washers present there.
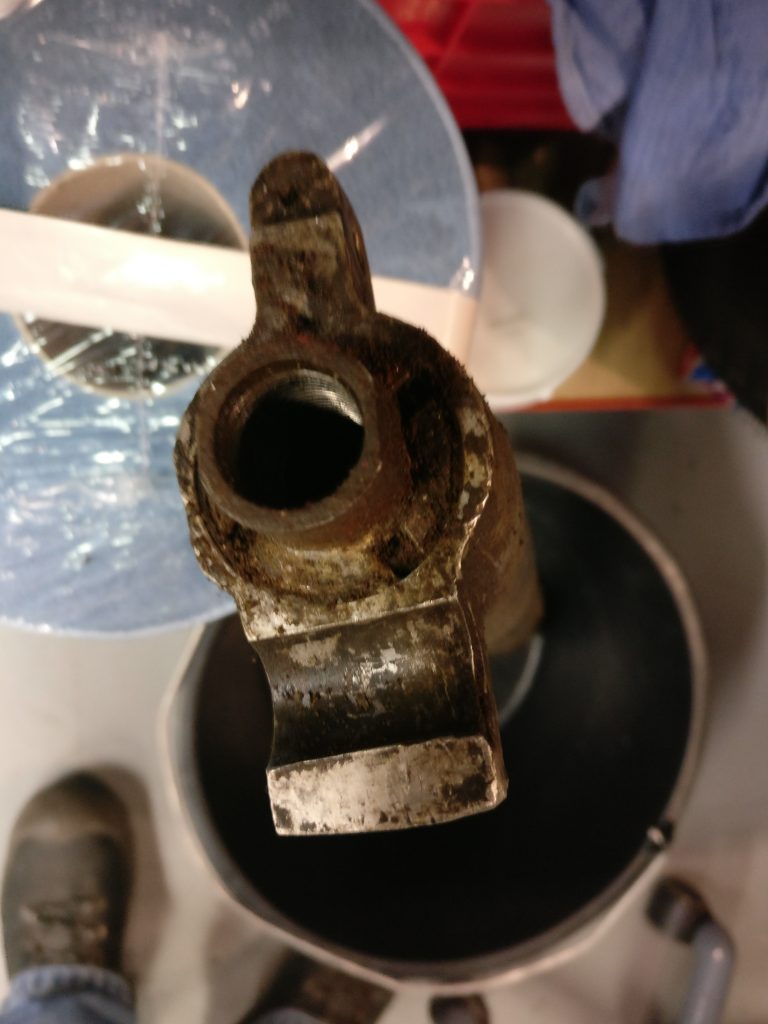
At this point, the spring stack should fall down below the fork shroud if the fork legs are still in the fork bridge. This allows access to the oils seal castle nuts. To be able to exert pressure however, the lower fork legs need to be held in place. I made a quick jig out of wood which I could clamp in the bench vise. In the picture you can see the underside of the lower fork leg:
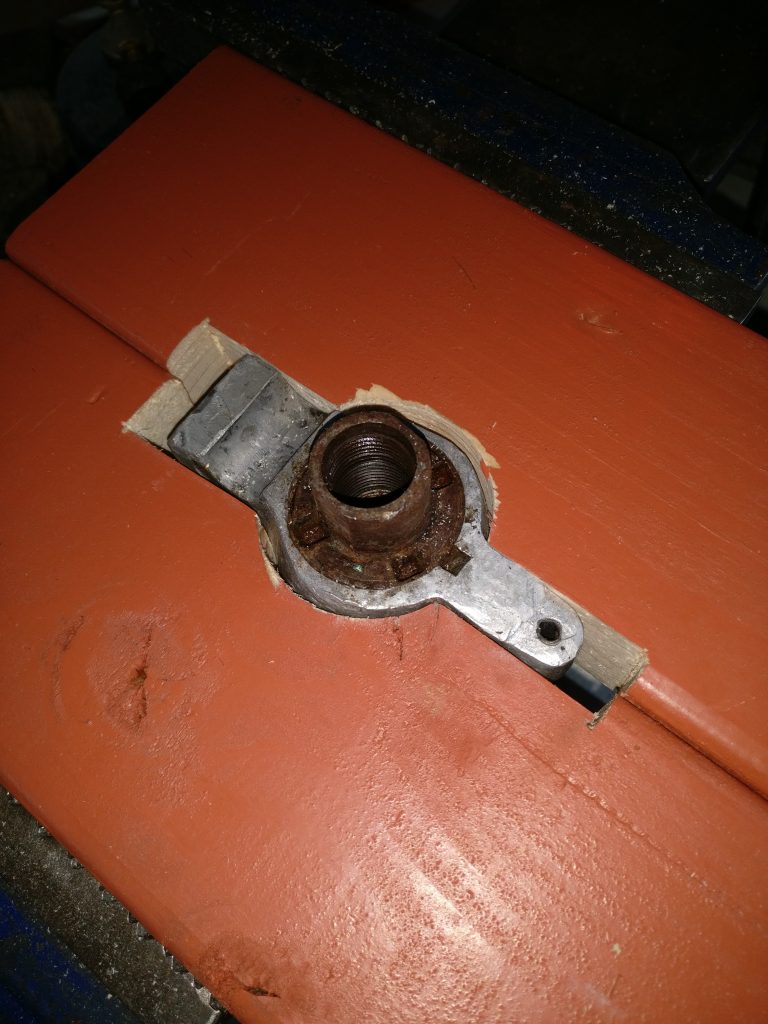
With a jig we can hold the lower front legs and remove the castle nuts:
I wasn’t able to loosen the nuts with either castle nut wrench, but when I used both at the same time, the nuts came off quite easily.
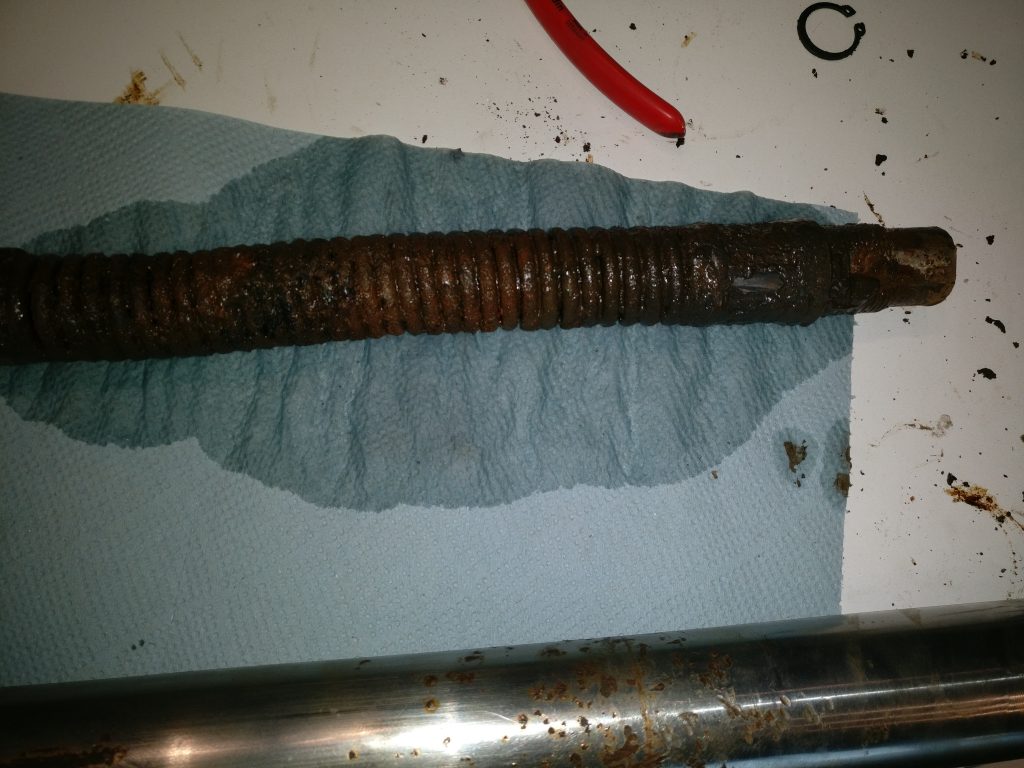
At this point you can remove inner fork legs from the lower legs. It took me a long time however as everything was rusted and crusted.
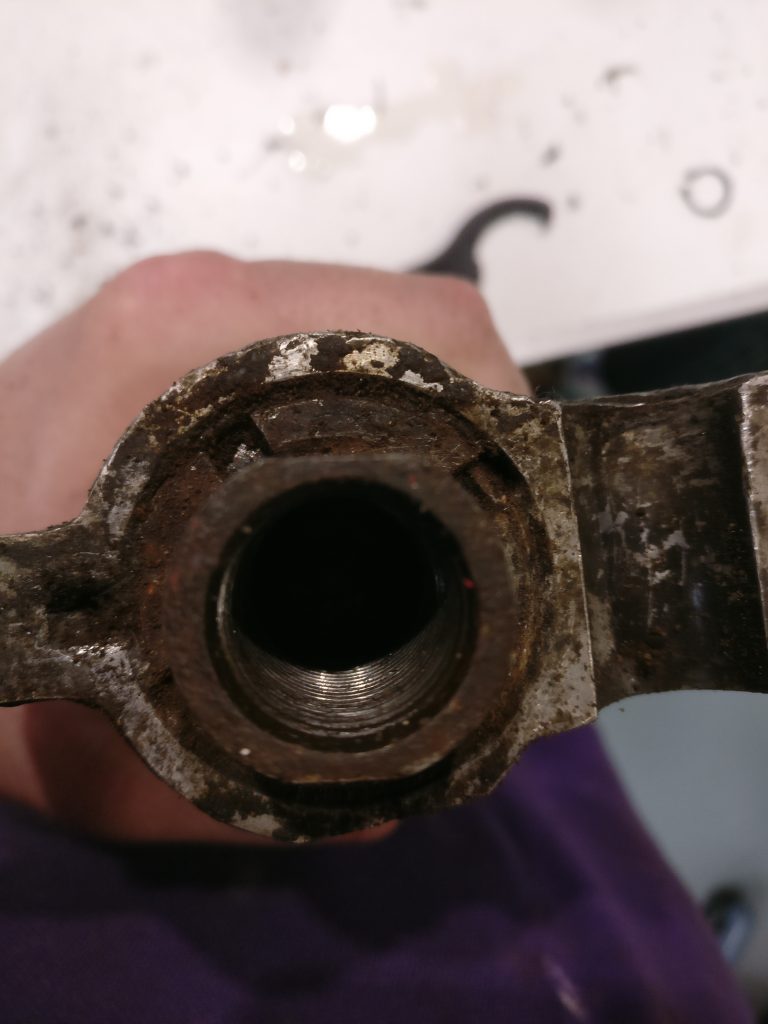
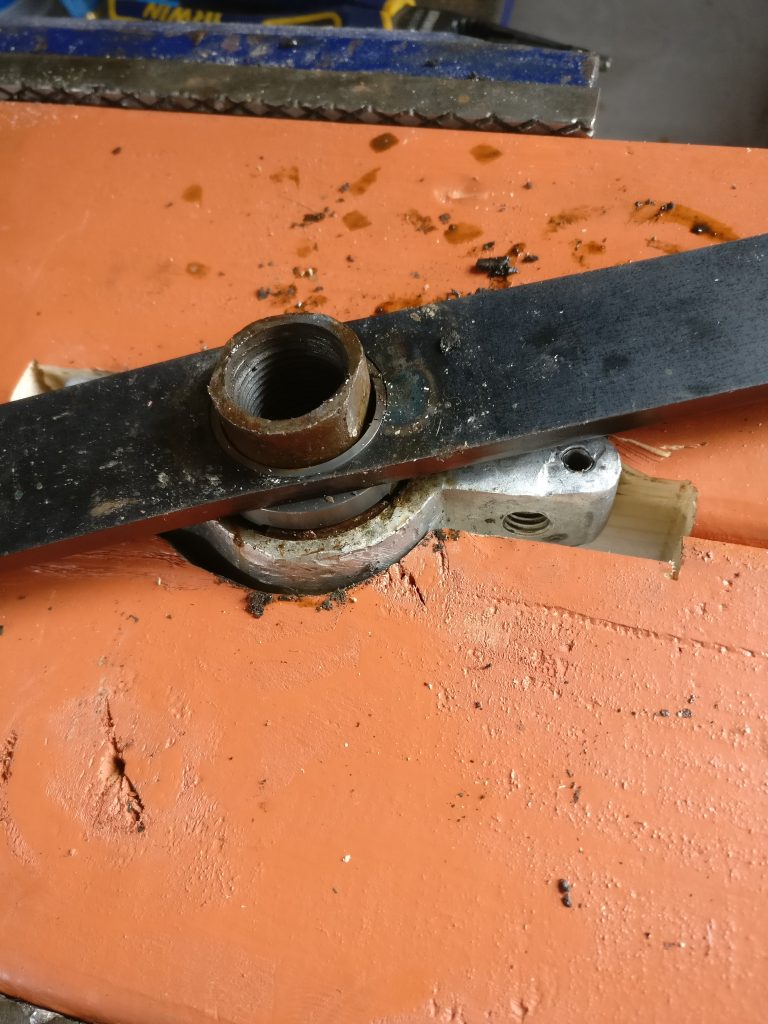
Next is a big challenge. The castle nuts at the bottom of the forks. They are hiding under the crud. I’m quite happy there is greasy muck covering them, as that might mean they are not totally rusted :
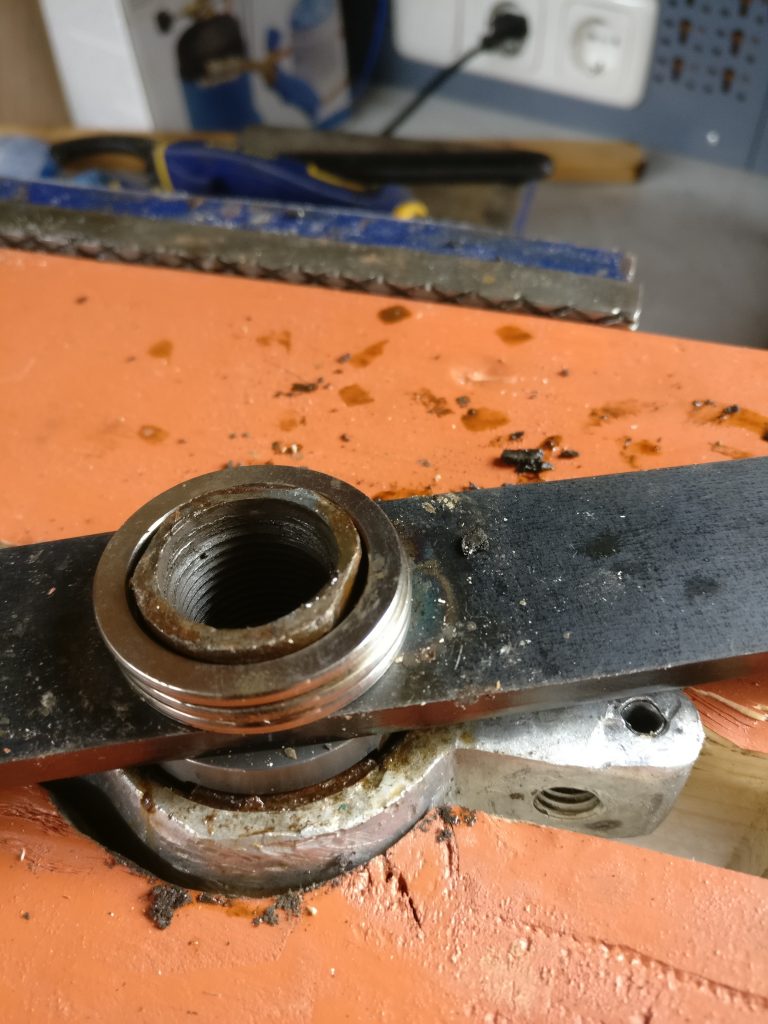
When you remove the muck, the nuts look like this:
At this point it’s important to take note of the following:
1. The nut is secured in place so it doesn’t undo itself through vibration. There is a ring in between the nut and the lower fork which is bent into the small depression in the lower fork on the left of the picture and into one of the gaps in the castle nut. So before you try anything, bend the ring back so it does not block the nut! You can leave the bit in the lower fork if you like, but he bent part that sticks into the nut must be straightened or you will damage the fork.
2. The nuts for the lower forks come in two sizes depending on your year of manufacture; one has indentations of about 6mm, the the other one has about 9mm; ensure you measure this prior to ordering any tools:

Now believe me when I say that a securing ring made from metal, in between the alloy lower fork and the castle nut is recipe for a very stuck nut. However, if you follow the following steps you should be able to remove it without too much trouble. It is a two person job however.
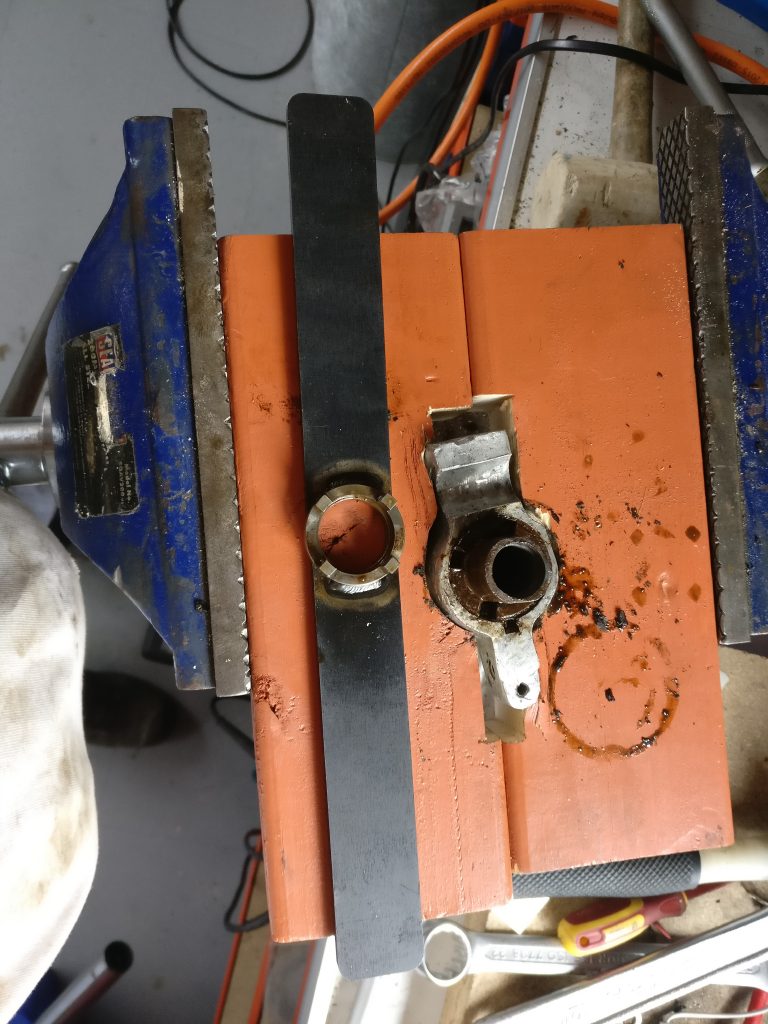
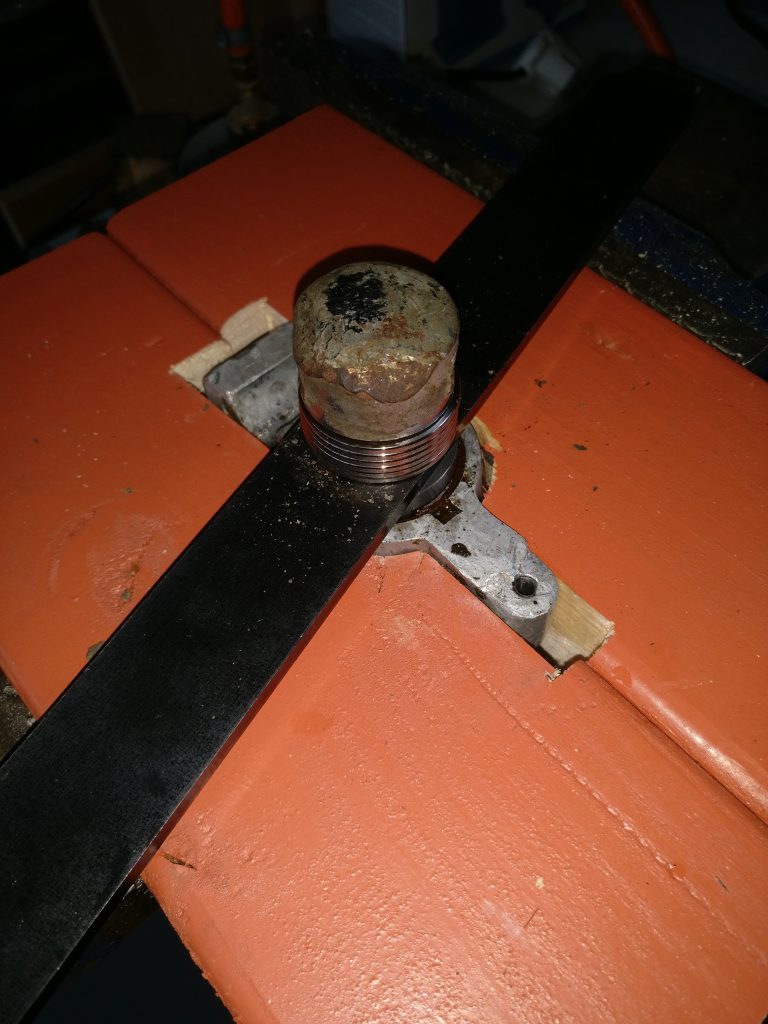
First we put the lower fork leg into the jig in the vise so we have a stable basis to work from. Then we put in a special tool that can be bought from the KS601 club; it’s a custom made castle nut socket welded onto a 30mm wide piece of metal bar. It comes, like the nuts, in two sizes, so measure before you order. When in place it looks like this:


Now this is where it gets tricky. Chances are your nut will be so stuck that you will not be able to remove it as is. Also, when you apply a lot of force, the tool can slip off the nut and damage it or your hands when you slip. So we’re going to ensure this can’t happen. We also want to be able to apply a counter rotating force so what we do is use the bottom fork bolt that is normally in place with and some washers that fill the space in between the bottom fork bolt and the castle nut tool. I used some washers that I took out of an old hard drive; they fit perfectly, but any washer of the right size will do:
The bottom fork bolt has a hole through it through which you can stick a rod to provide the counter pressure. The only way I could get sufficient torque was by using two 30mm spanners on the 30mm bar on either side while my capable assistant (my dad) used two ring spanners on the rod through the bottom fork bolt. That looks like this:
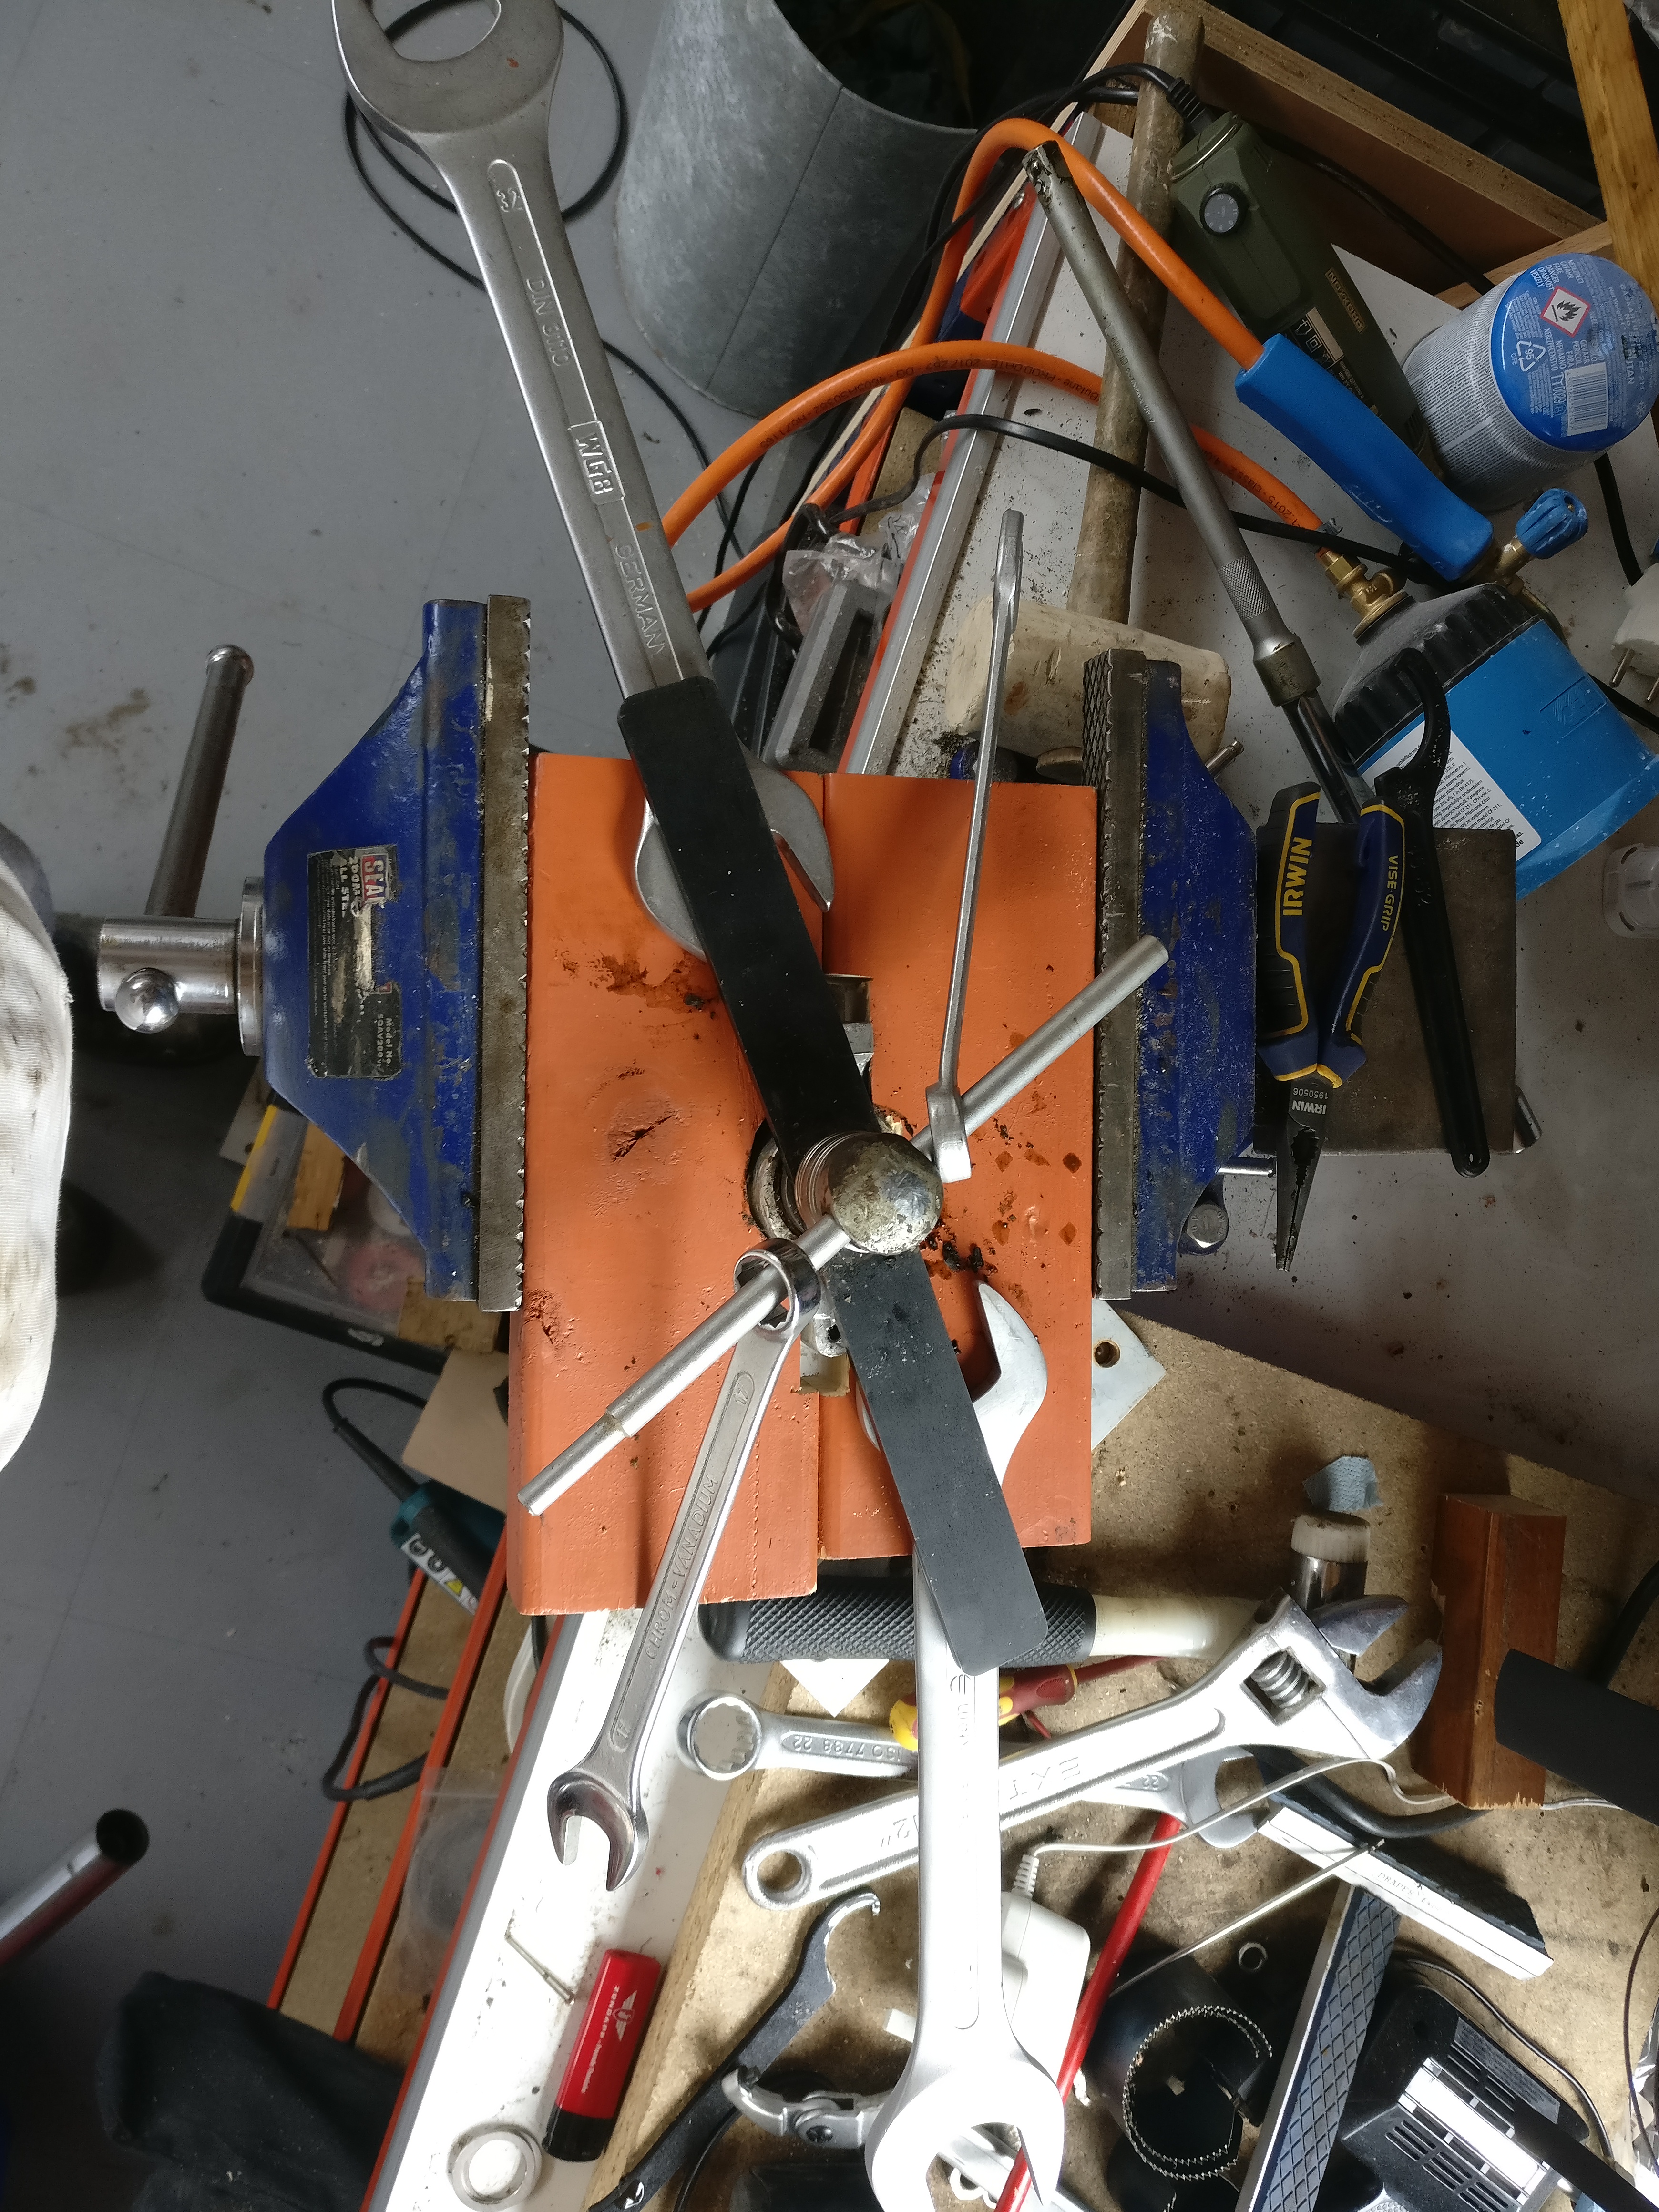
The force needs to be applied to the castle nut and the rod just needs to be held in place. With both of us applying force we were able to remove four nuts (I needed to take another fork apart too). To give an indication; I took just about all of my strength for the nut to give up and come loose and that is after three days of penetrating oil and applying heat before loosening the nuts.
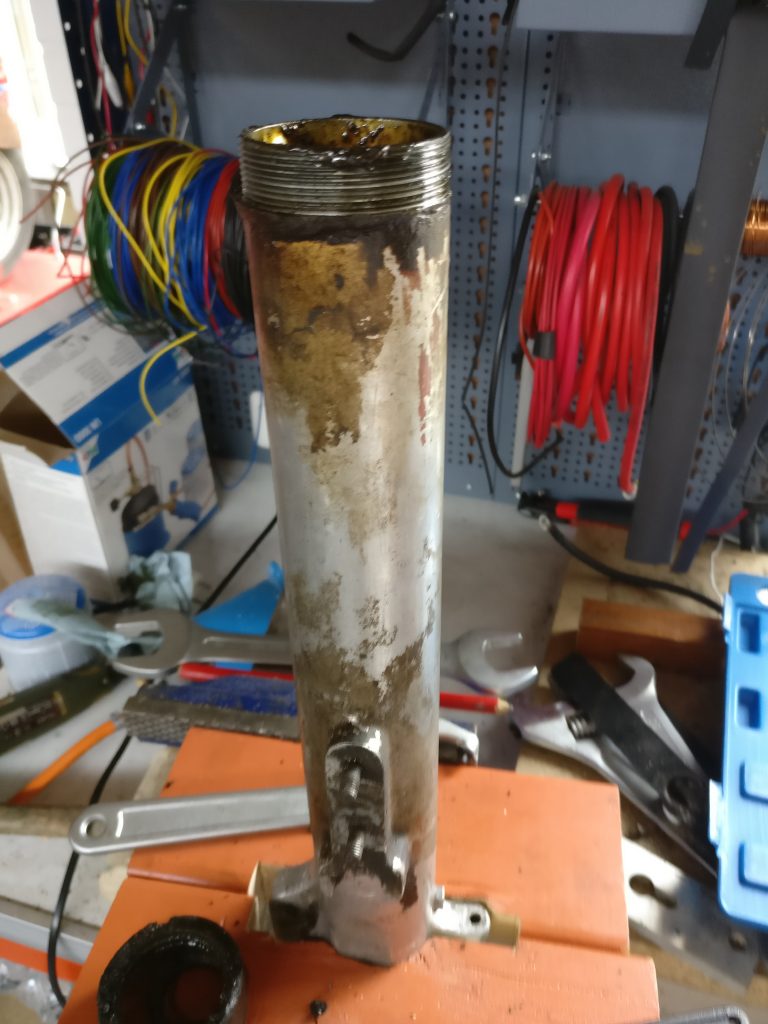
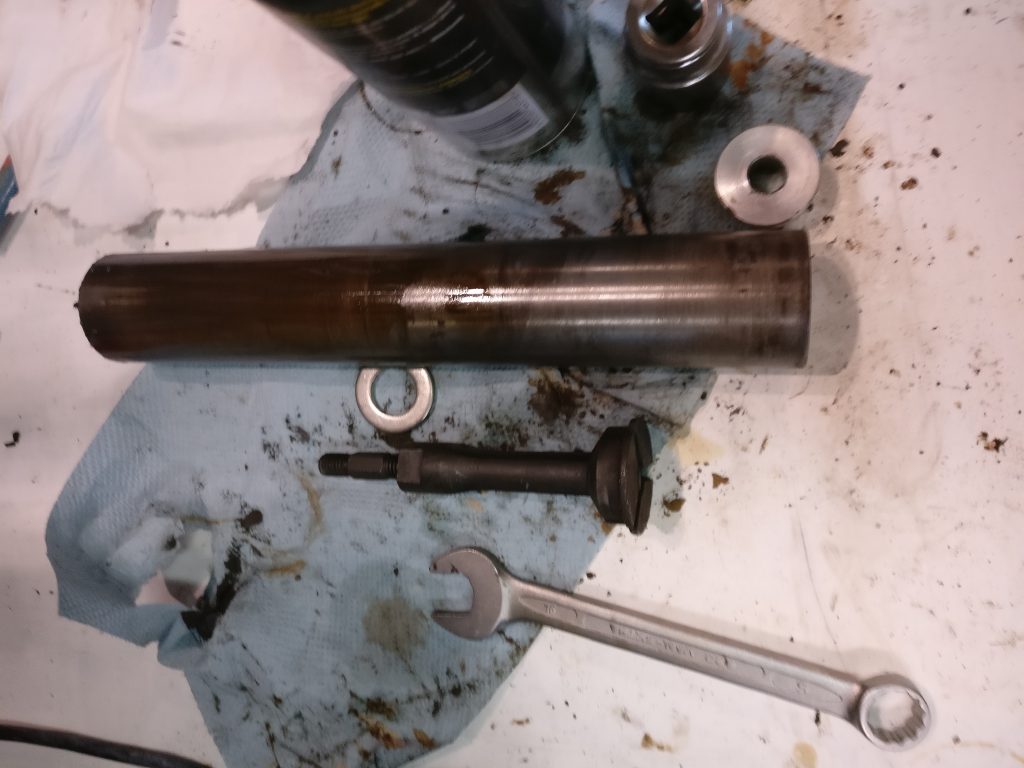
That being said; all nuts came loose and nothing was damaged, so I call that a success. You can now take the spring stacks and securing ring out and the bottom looks like this:
Taking out the spring stack took me a long time as it was caked, rusted and simply stuck. When I turned over the inner front leg this came out:
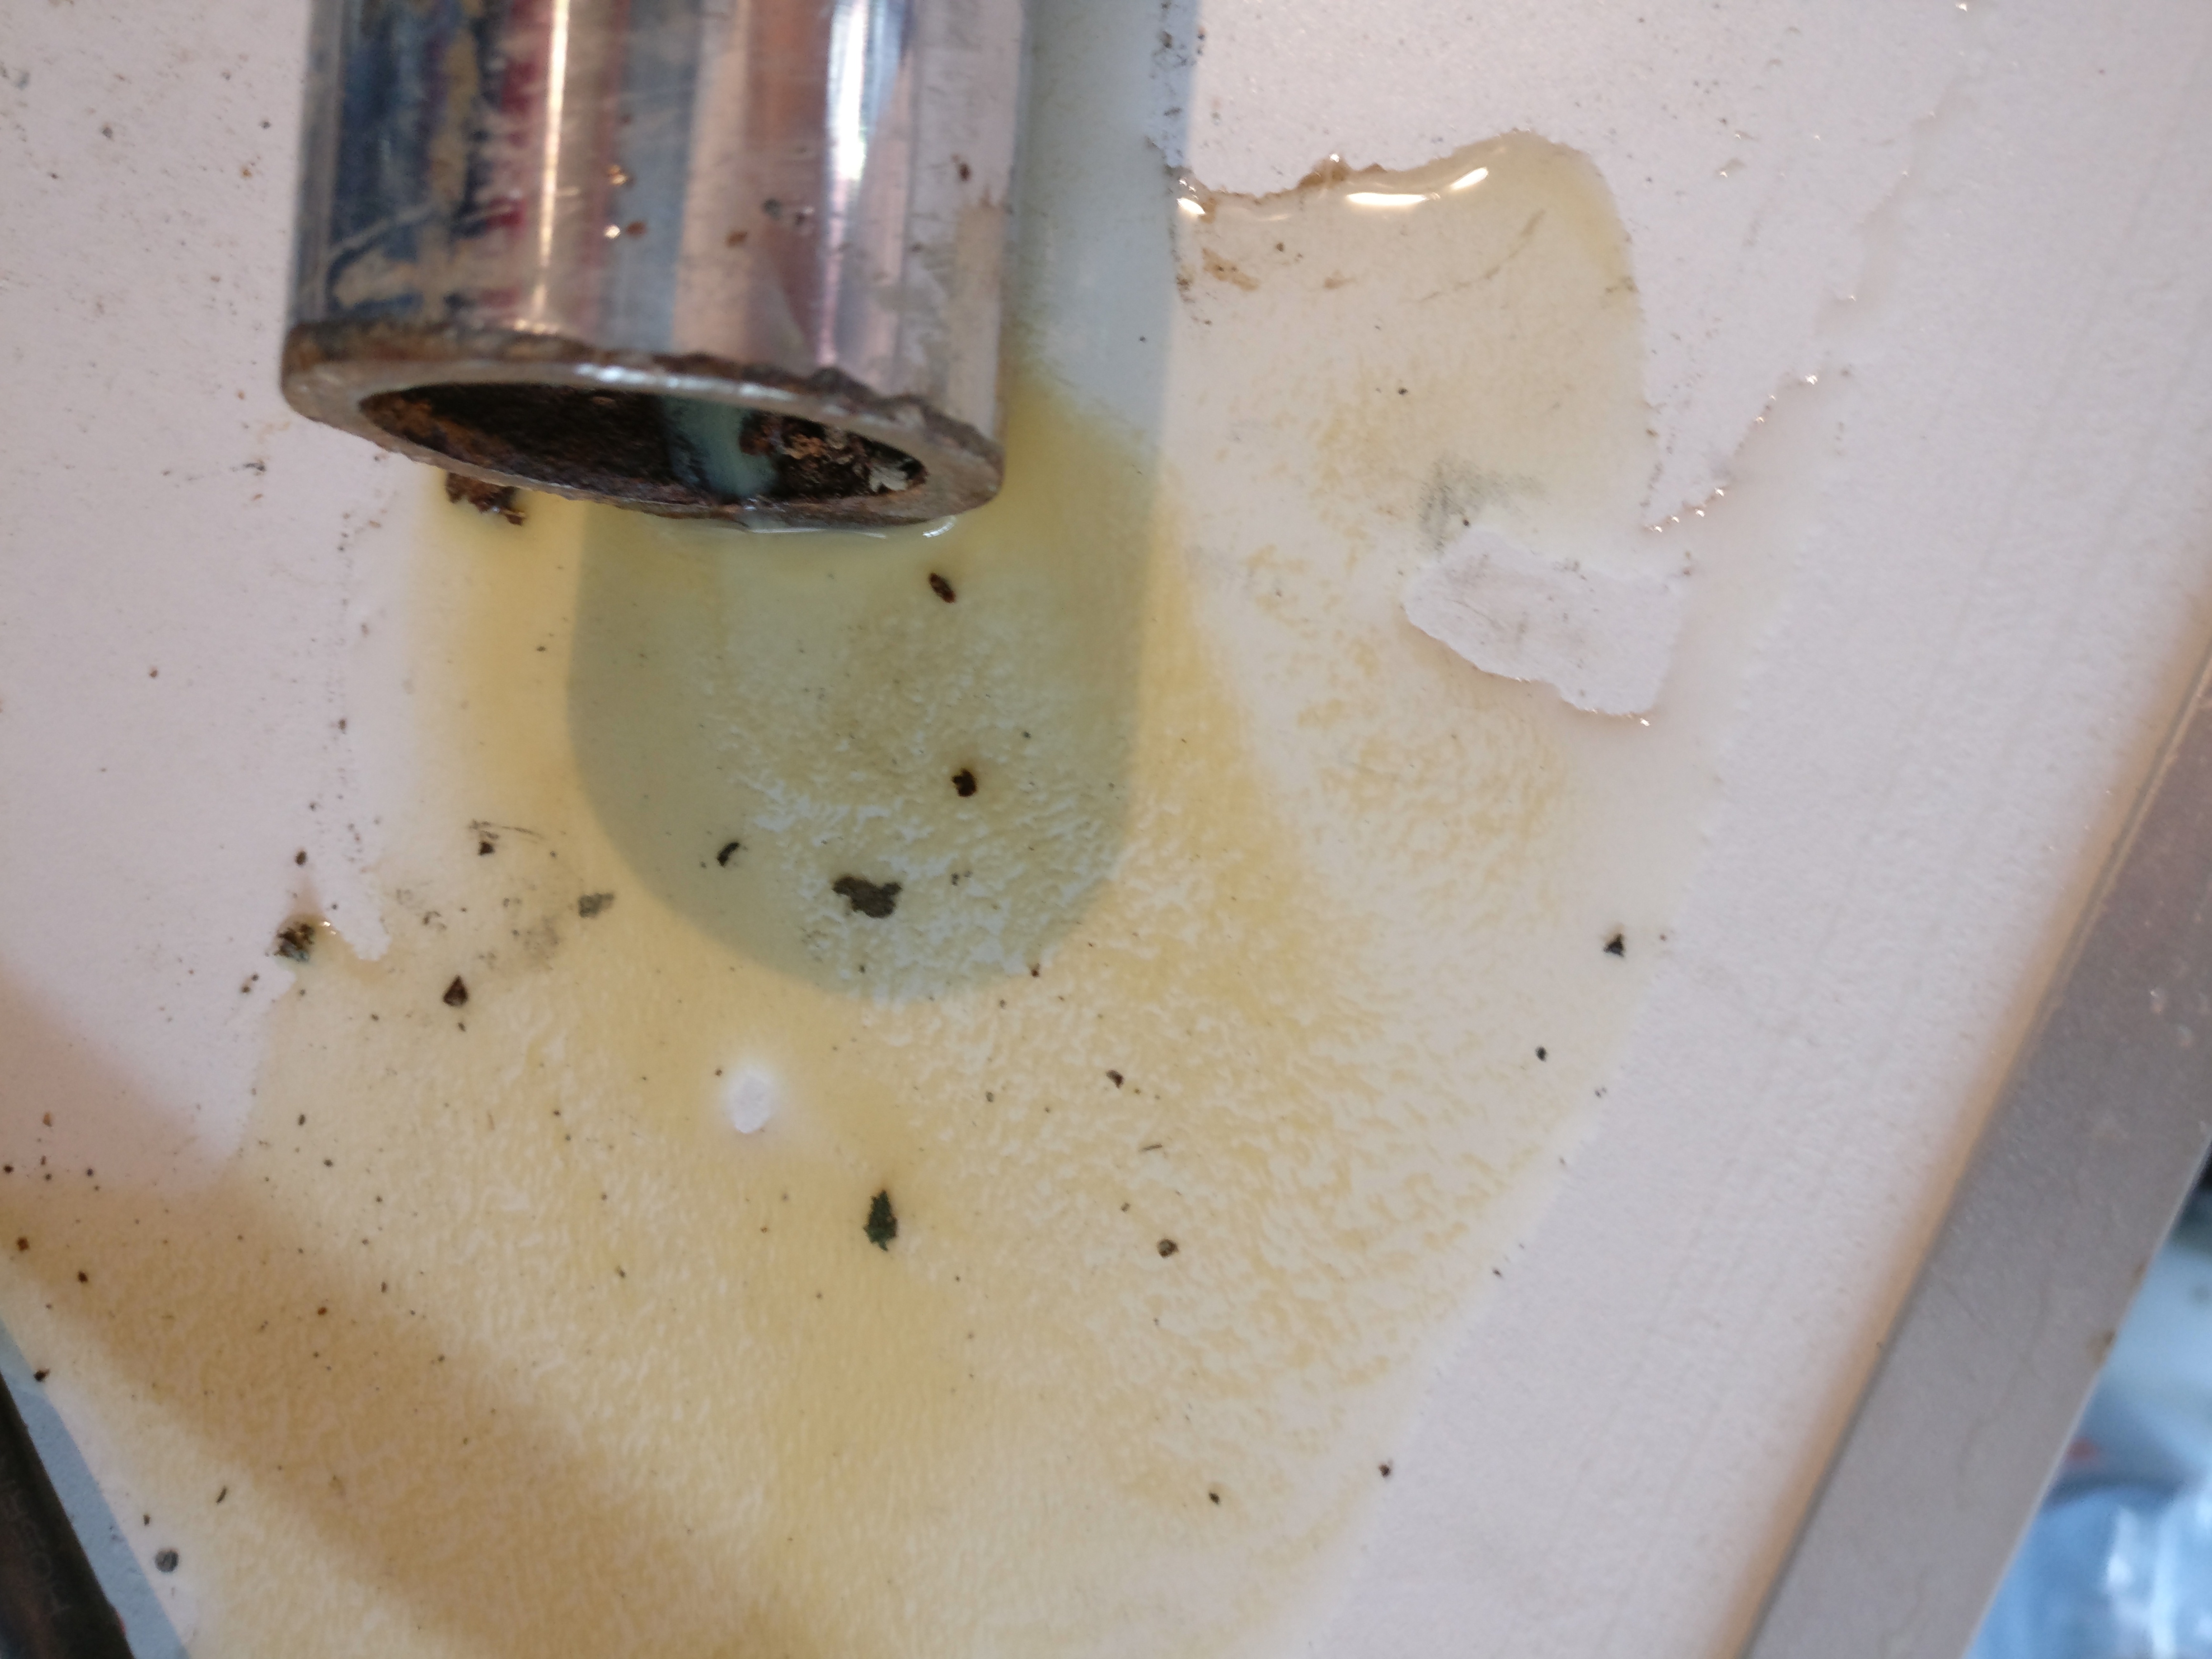
Water is never a good sign for in any motorcycle part… But in the end it all came loose.
Sadly, one of the spring stacks is broken. The bolt that holds the lower spring to the supports at either end was rusted through. After hours af scraping off old muck and putting everything through the ultrasonic parts cleaner a few times it all looks clean and presentable. You can see the result at the bottom. The rust is actually not bad; that is the advantage of using too much grease.
The final things to remove are the bearing bushes inside the lower fork leg. There are two in there; a long one and a small one. A third one is mounted on the inner fork leg with a snap ring.
In my case the long bearing bushes did not want to come out. I suspect through all the oil and muck built up over such a long time. In the end I used an internal bearing remover that I expanded inside the lower fork leg and then put the whole thing under my press:
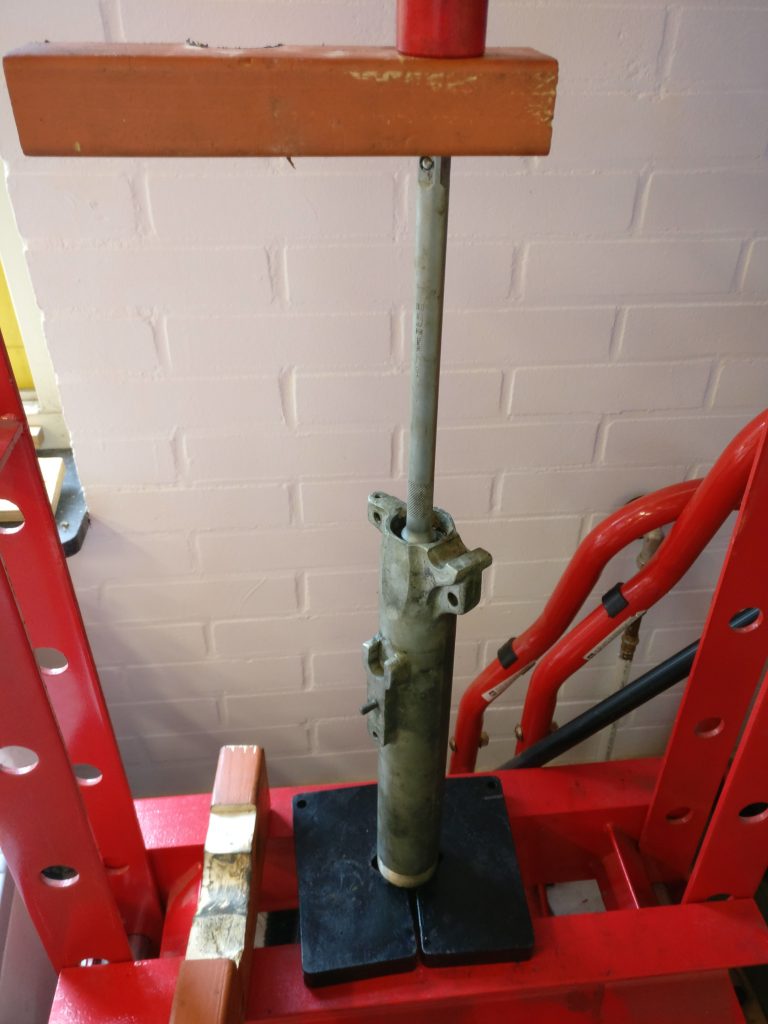
With a little patience, all the bushings came out and looked to be in a good state. After cleaning I laid everyting out on a table:

Let’s compare that to what we should have:
What we note is that we are missing some washers as already described and some seeger rings, but also, that the spring stack is different. The upper spring is not a single spring but instead a set of three in my case. I’ll need to inform whether that is normal or not.
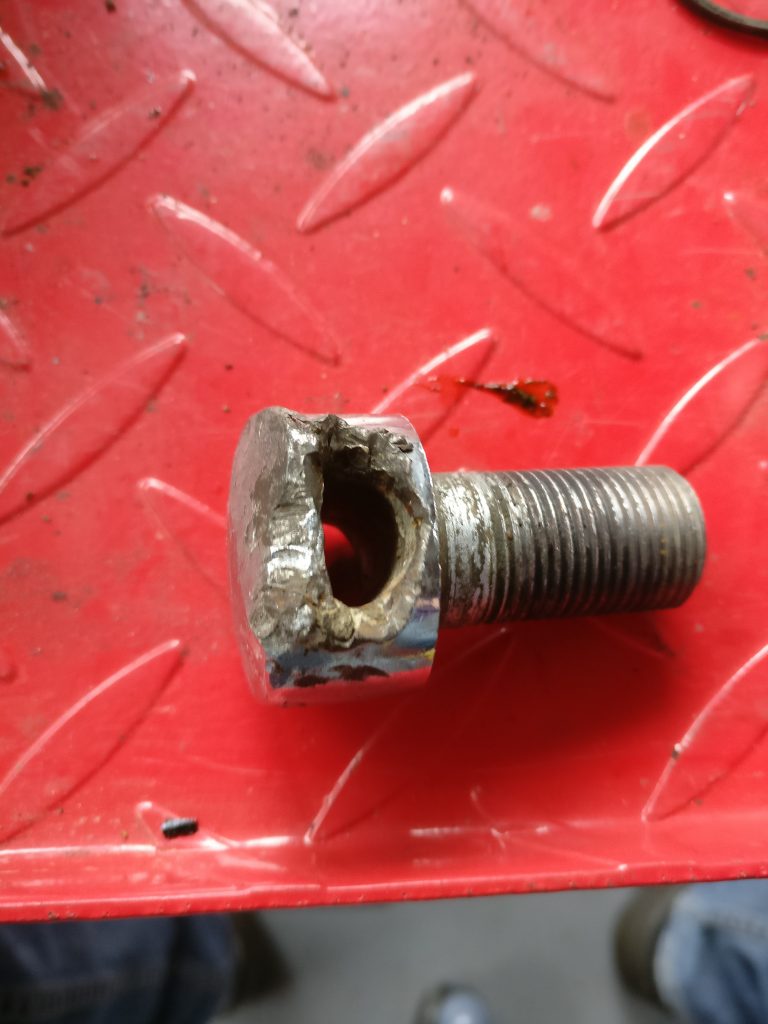
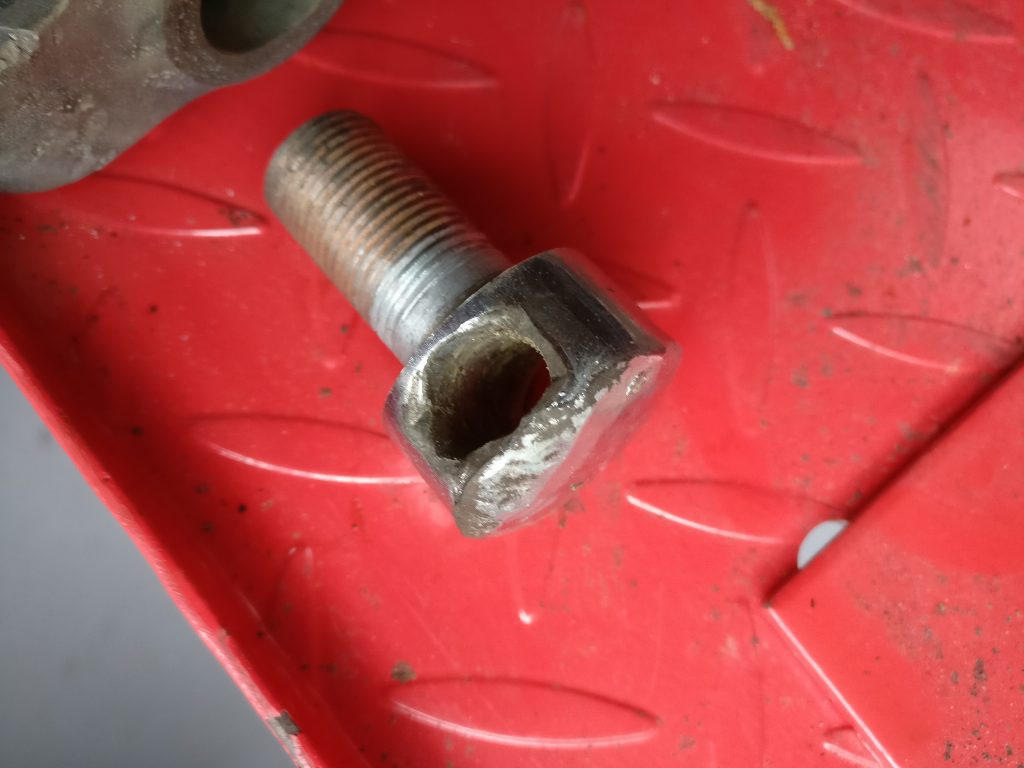
Next we take a look at the individual parts to see what’s going on. First we notice that the bottom fork bolts are severely damaged. I can’t explain this other than that someone dragged the whole bike while the front wheel was not installed:
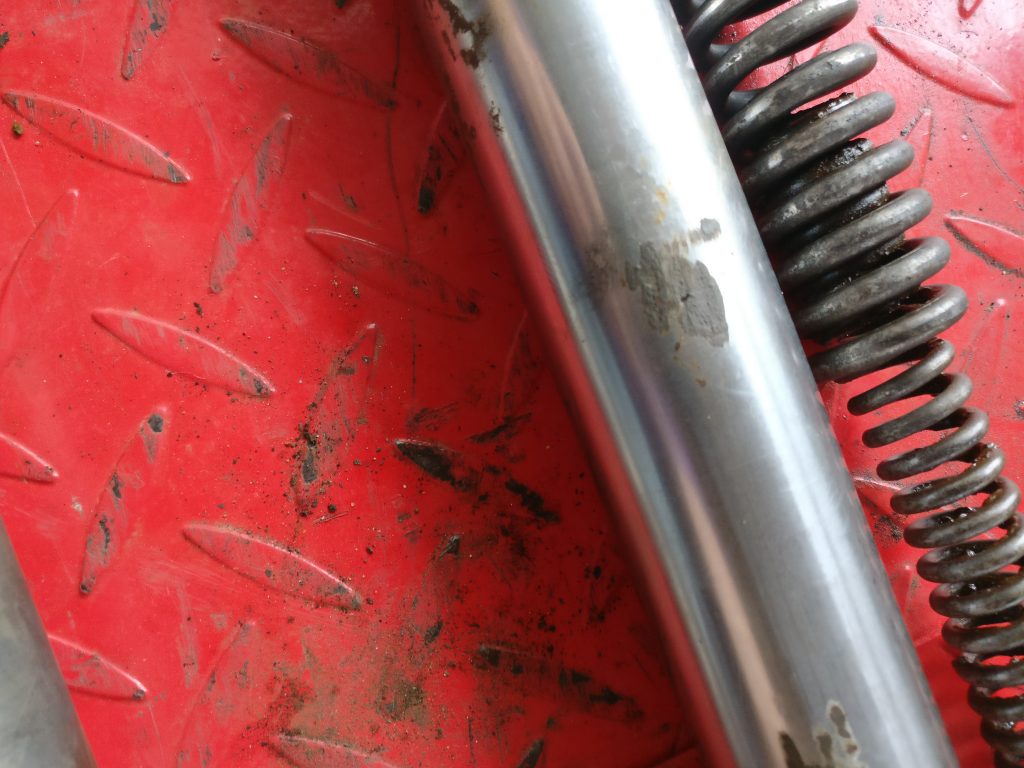
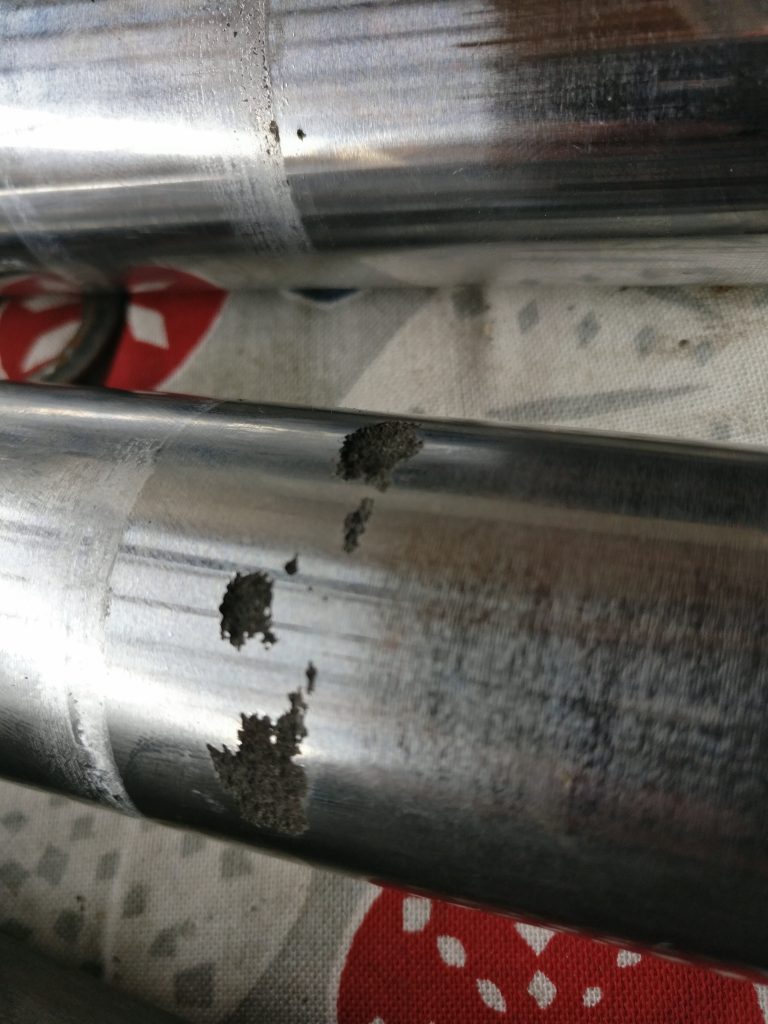
The inner fork legs need straightening…. this is on a flat surface:

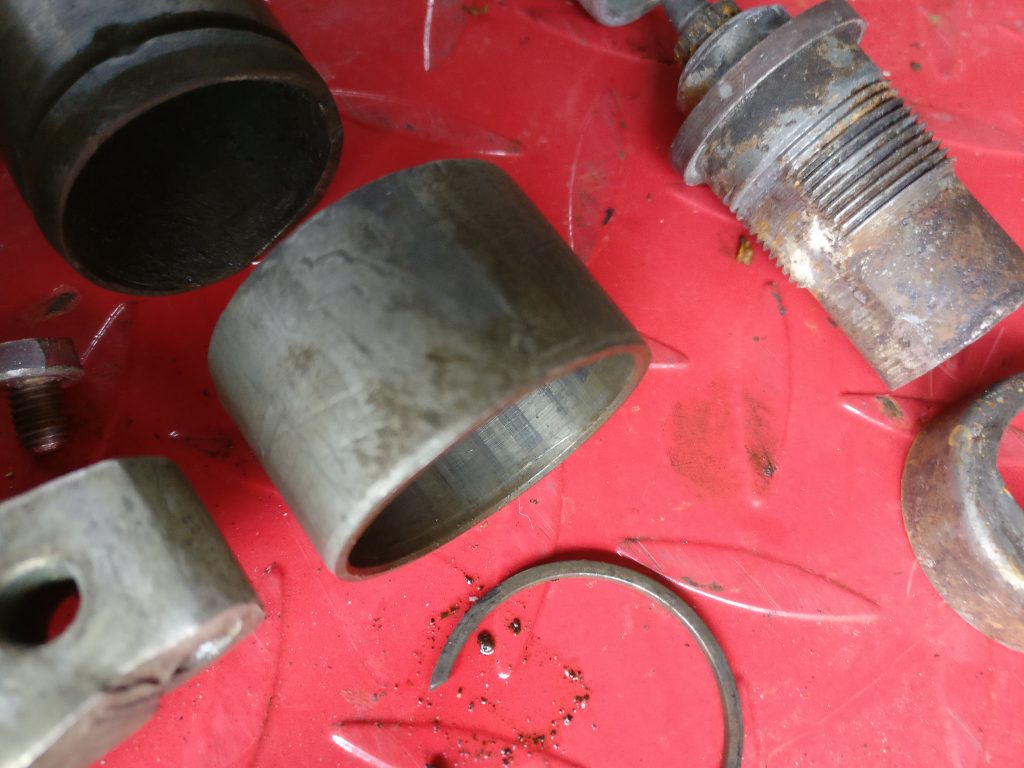
One of the small bearing bushings is very worn as you can see and one has unexpected holes. I also don’t know how much internal and external play they are allowed to have. I will need to ask and find out:

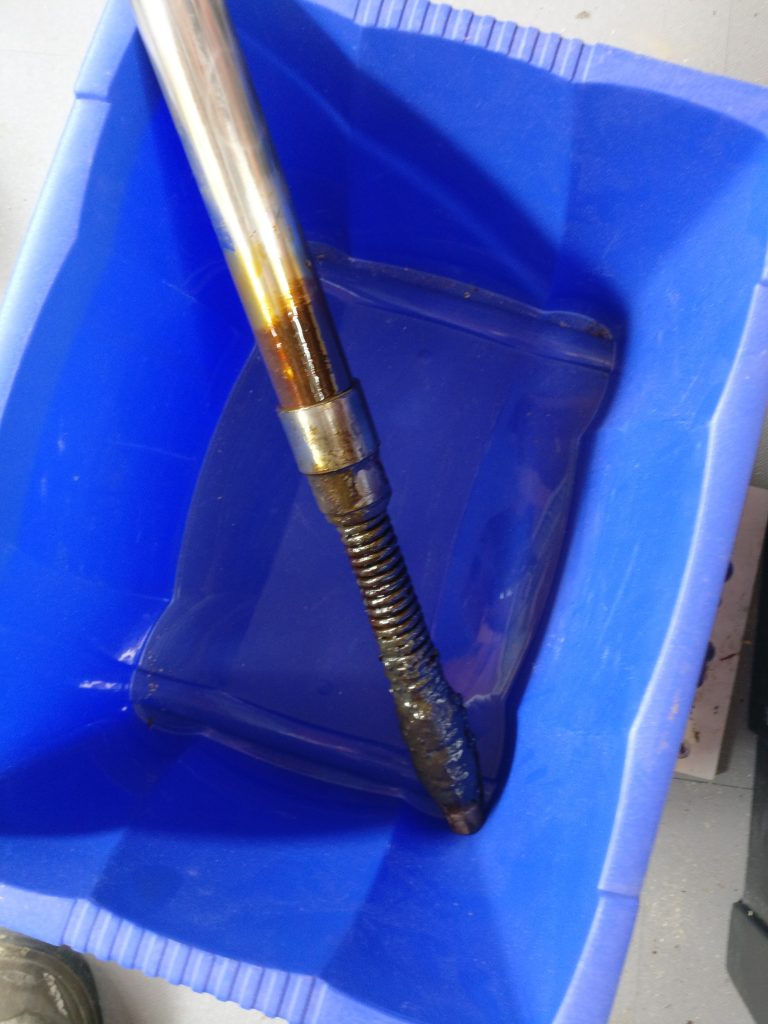
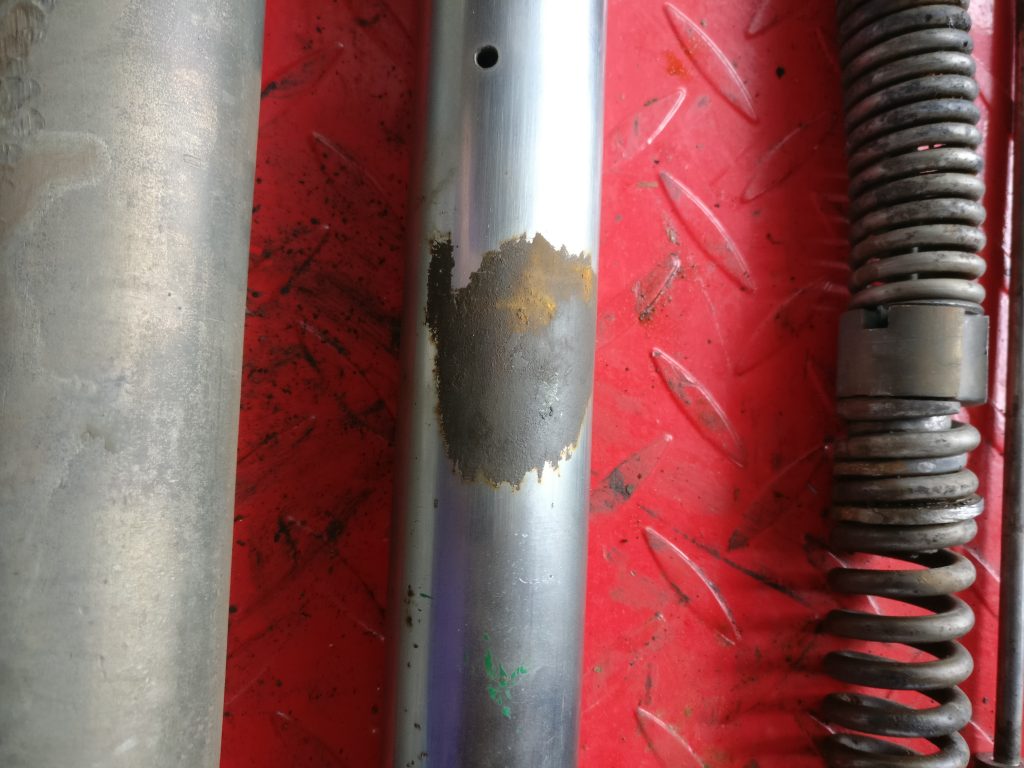
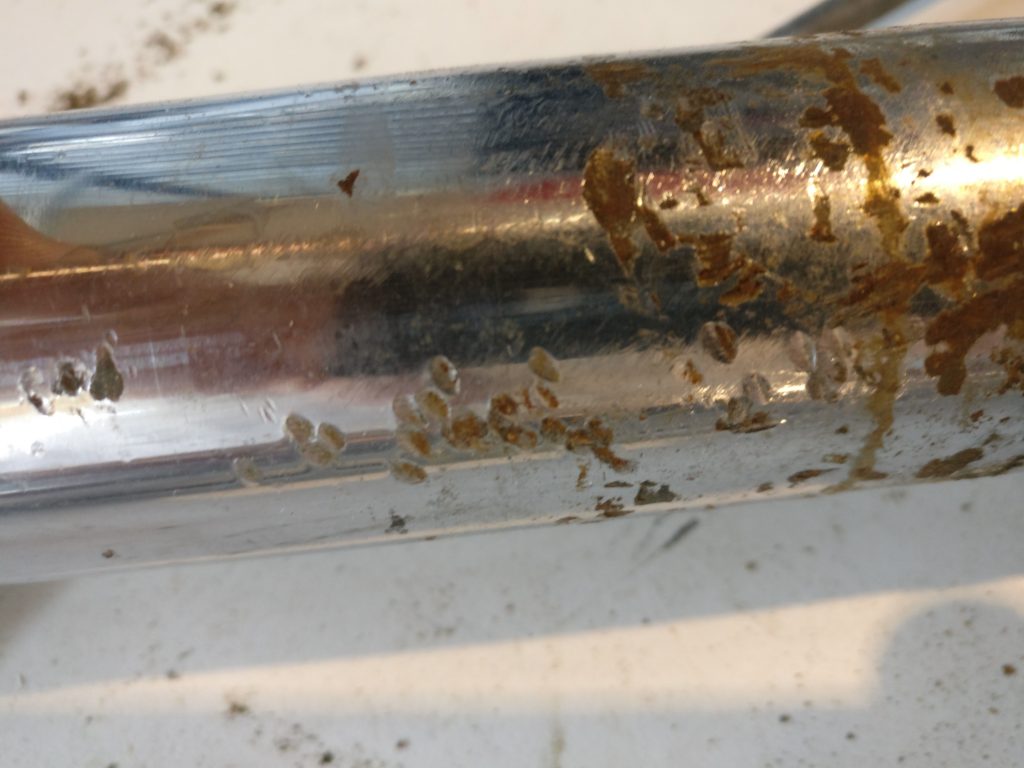
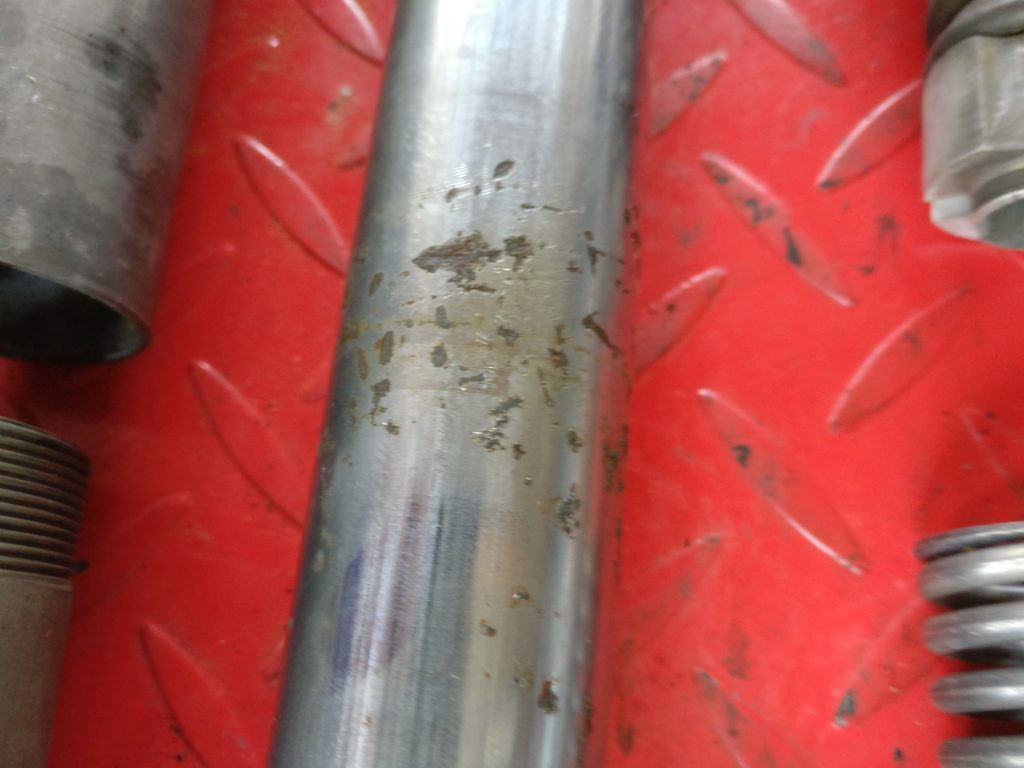
Finally, the surace area of the inner fork legs is quite bad. I am not sure whether re-chroming is possible, so I may need to find some new ones:
So there it is; the front fork disassembled. Next is restoring them. I will add the relevant photos once this has been completed.